While most professionals and manufacturers prefer to install vinyl dry, there are occasions when wet is the way to go.
While it’s true that the dry installation method of vinyl application saves time and money, let’s face it, not every graphic installer has the necessary skills or experience.
The wet application method applies a vinyl graphic to a substrate by using a fluid to assist with positioning. The dry method, as its name indicates, does not use fluid but rather depends on the skill of the installer to correctly position the film.
Those who are still learning need the flexibility that wetting solutions can offer. Moreover, experts admit that there are some unique applications and conditions that require wetting solutions to achieve a long-lasting adhesion.
“Wet applications are good for beginners,” says Jeff Stadelman, technical marketing manager for the graphics product group at MACtac, a manufacturer of pressure sensitive adhesive. “It gives them an opportunity to learn the ropes before moving on to bigger projects.”
The Advantages of Wet Applications
One thing is sure, if there weren’t benefits to applying vinyl wet, then there wouldn’t be profitable companies peddling wetting solutions.
Perhaps the most compelling advantage of wet applications is the ability to reposition the graphic with ease. In dry applications, if the graphic touches the substrate before you have it in a set position, then you have to snap it back up. Without wetting solutions, the vinyl is a little more difficult to handle because it is sticky.
“When you spray the liquid on there it deadens the adhesive for a period of time,” says Molly Waters, spokesperson for Avery’s technical marketing department. “That gives you flexibility. If the adhesive touches to the adhesive, then the graphic folds and on some materials it could be difficult to pull back apart and you could ruin the graphic. If you apply it wet, then it’s not going to damage it.”
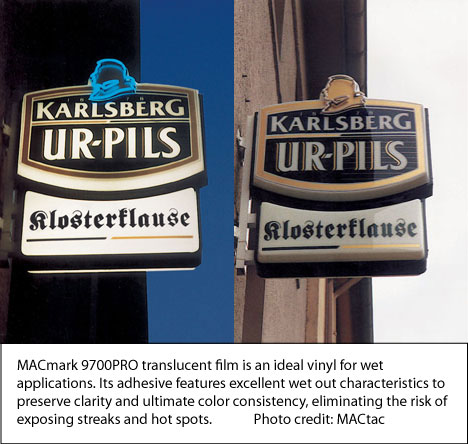
Another reason some installers prefer to use wetting solutions is because they can help reduce air bubbles and wrinkles in the vinyl, especially with translucent or clear films. (Outgassing, which is the vaporization of a solid or liquid, causes bubbles. Outgassing can also occur in some plastics and insufficiently dried paints, resulting in adhesive failure of films applied over them.) That said, wetting solutions could actually cause more bubbles if not used properly and/or not applied to a clean surface.
Doing More Harm Than Good
If you must apply wet, experts suggest investing in a leading wetting solution instead of trying to make your own.
“A lot of people are mixing up their own ingredients,” says Waters. “Let’s say you use a soap and water mixture. If you use a soap that has hand lotions or perfumes in it, then that’s an extra contaminate that is now between the adhesive and the substrate. So it can actually affect how well the graphic is going to adhere.”
Likewise, she says, if you put too much soap in, then it acts as a contaminant between the adhesive and substrate that can affect adhesion. So you go through an extensive effort to clean the substrate just to contaminate it once again. (For more information on how to ensure contaminant-free substrates, read our article entitled “Preparing Surfaces for Vinyl Installation.”)
Proceed with Caution
There are some potential challenges that could arise with wet applications, too. Lindsay Howard, a product specialist for Oracal, a vinyl manufacturer in Jacksonville, Fla., says wet applications need more time to dry to avoid potential problems with either line stability of the inkjet film or solvent remnants getting caught in the sheeting.
“If you don’t allow the wetting solution to dry long enough, then you could risk pulling up the vinyl when you pull away the application tape,” says Howard.
Caution: Some application fluids can cause vinyl adhesive failure. Howard says if you use the wet method with water-based adhesives, the adhesive turns white. This process is reversed after some time, but the time it takes the adhesive to become clear again depends on the surrounding conditions, such as temperature and humidity. Speaking of which, there are also temperature restrictions with wet applications. Wet application should only be done when temperatures are at least 64 degrees Fahrenheit.
When Wet is Advisable
There are certain substrates and conditions under which wet applications are the best route. Wet applications may be advisable with clear or translucent film applications, larger graphics on glass (especially reverse-cut interior applications), critical alignments, hot surfaces, and windy conditions. That said, wet adhesion is typically only recommended for PVC films. PVC is a thermoplastic that is strong and especially resistant to water, acids, and abrasion.
While the pros often cringe when they hear about wetting solutions, even Nathan Franzblau, founder of the Professional Decal Application Association, an association of independent certified installation companies, agrees that wetting solutions are sometimes necessary.
“If you are going to do a glass application or a Plexiglas application, though these can be done dry, a lot of people do use wetting solutions to avoid problems like static,” says Franzblau. “It makes the adhesion a little more aggressive to glass.”
How to Apply Wet
Whether you are a beginner that is relying on wetting solutions, or a pro that is applying to a substrate on which fluids boost adhesion, it is important to review the tenants of wet installations.
Begin by spraying the surface with the wetting solution. Next, remove the vinyl from the backing paper by peeling it back from one corner. Backing paper is also known as a release liner or carrier and is the portion of the pressure-sensitive construction that protects the film’s adhesive before it is applied. The backing readily separates from the film immediately before it is placed on the substrate or target surface. You may also spray the adhesive of the graphic.
Next, place the graphic on the wet surface and position it. Once you are satisfied with the position, begin at the corner and press it down using moderately firm, overlapping strokes, making sure the squeegee applicator is flat with the substrate along the entire length of the stroke. This will help remove the fluid. Hold the squeegee at a 50-70 degree angle to the surface. The flatter the squeegee the better. Overlap all strokes by about 50 percent.
“Make sure you press the film surface using sweeping, overlapping motions with a squeegee to get all the water out from between the surface and the adhesive,” says Howard. “Otherwise you will have bubbles and may not get a strong bond between the media and the substrate. The bond is improved if the film is pressed again after a few hours.”
Now wait a few minutes and then saturate the paper cover tape with the wetting solution, then remove the tape and wipe the surface with a paper towel. Finally, inspect the edges and corners and re-squeegee if necessary and do a final clean up of any left over fluids or thumbprints or other residues.
If you are confident in your abilities to apply wet and want to advance to dry applications, then check out our article entitled, “Boosting Adhesion in Dry Applications.”
As seen on signindustry.com


