Building a work table is easy enough for anyone to construct. What’s more, it takes very little time to build. And if you build it right, it could last you the rest of your life. Best yet, the cost is minimal, especially when you consider that you will use your work tables more than any other piece of furniture, machinery or tool that you own. If you haven’t built a work table before, here are a couple of suggestions, that I received from several sign makers.
Before you start cutting up any lumber, the first step is to draw up a dimensioned plan. Then, make a list of each piece that you will need for the project. With good planning, you will minimize mistakes, material usage and cost.
If you are building several tables, make sure that you construct them so they are all the same height. That way if you are working on a big project and need a massive work surface, you can push the tables together (as shown in the photo below). If your shop space is limited, I recommend building tables with casters, which allows you to easily push them out of the way so you have the room you need to work.
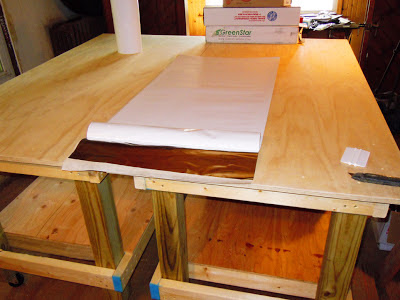
Table height. Opinions on the optimal height of a workbench vary. The height for you will depend on your physical stature and how you use the workbench. If you sit while you work, 30 inches is a good height, which about the same height of a desk. For my uses, this is an impractical height. If I am applying graphics, I like to stand and prefer to work on a taller table, so I don’t have to crouch over.
To suit my needs I constructed most of my tables at a height of 36 inches. This is the same height as a kitchen counter top as well as a popular choice for work tables in many shops. The workbench that I built for woodcarving, though, is much taller at 44 inches high. When I am carving, I like to rest my elbows on the work surface. Not only is this more comfortable for me, because it relieves the stress on my back, but resting my elbows on the table also gives me better control of the gouge.
Tool Carts. At the same time that you are making your larger tables, also make a couple of smaller tables. The smaller work benches are handy, because they can serve as tool carts. That way, you can lay out the tools you need on the smaller table. Your tools are easily within reach and they don’t clutter your primary work surface.
Legs. For stability I used 4×4 posts for the legs of many of my work tables. On one table I have also used 2x4s screwed together to make the legs, which works just fine. To ensure that all of the 4x4s were cut exactly, I had them cut to length at the local home center.
Lower Shelf. Underneath each production tables are shelves. A shelving unit functions as a stretcher, preventing any lateral swaying and stabilizing the legs of the table. The shelves are also great for storing tools and supplies. Tip: since I have more than two dozen tool boxes, each box is clearly marked so I waste less time looking for my tools.
Table Top. For the tops of my work tables, I wanted a nice smooth surface to work on, so I used ¾” A/C grade of plywood. You could also use MDO. In designing the top, allow for three to four inches all the way around the table for clamping. If you anticipate that your table top will take considerable abuse and require regular replacement, I would suggest a two layer top. The first layer should serve as a permanent base. On top of that, apply a second removable layer, which you should secure to the base with four to six screws.
How you finish the top is a matter of taste and function. The first tables that I built, were sanded, primed and painted grey. Afterwards, I thought that this looked too industrial. The other tables are stained and varnished. To keep the surface clean when I am painting, I recommend covering the tops with application tape.
The workbench used for vinyl graphics is covered with a cutting mat the size of the table top, which prevents damage to the surface. As an alternative to a cutting mat, you can also cover your table with a glass top.
Casters. All work tables should have heavy duty casters so you can easily move them around your shop. Casters should have a locking feature to prevent the table from rolling around when it is in use. Being able to move the tables also makes cleaning under them much easier.


