
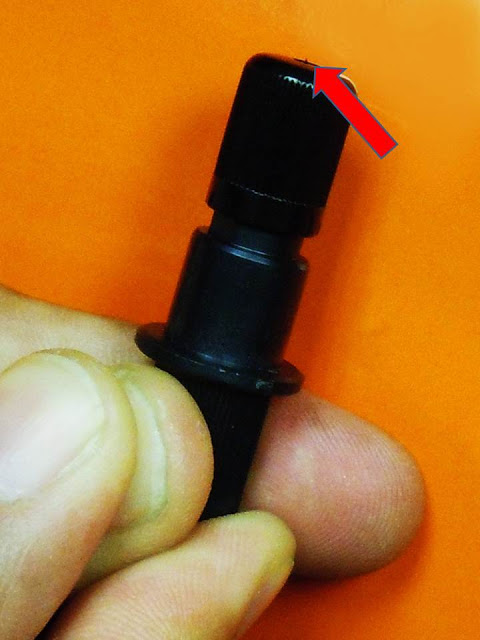
Be sure to check blade depth. As a rule of thumb, it should be set at about half of the thickness of a credit card.
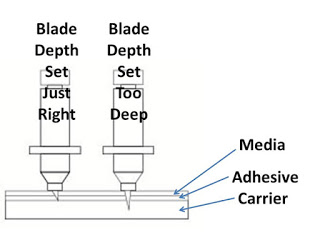
Diagram A.
Adjusting Blade Offset. Blade offset is the distance between the tip of the cutting blade and the center of the blade. This distance will vary depending on the angle of the blade used.
For accurate cuts, especially at the corners, you must adjust your plotter’s offset setting to the manufacturer’s recommendations. In many cases this setting is frequently ignored. Improper settings are not difficult spot. A telltale sign that the offset value is too low is that the outside corners are rounded off. Conversely, if the corners protrude or end in a spike, the value is typically too high.
Downforce. Downforce describes the amount of pressure (generally designated in grams) that is applied to the cutting blade. Cutting polyurethane may take as little as 70 to 80 grams of pressure or less. Generally, much less pressure than you need when cutting pressure sensitive vinyl. Flock films will cut easily too, usually at about 80 to 90 grams.
The ideal setting is to use the least amount of force to accomplish the job. If the plotter is not adequately cutting the media, first check the cutting depth. If that is set properly, adjust the downforce. In many cases the remedy is to decreases not increase the cutting pressure.
Cutting Speed. When plotter cutting heat transfer films, especially when you are cutting polyurethane films, which are very stretchable, or designs with intricate detail, you will most likely need to slow your cutting speed.
Conditioning the Media. Temperature can great affect the layflat stability of the sheet whether the carrier is either film or paper. If you just brought in a roll into your shop from extreme cold, you may need to give it time to come up to temperature before using it.
If the carrier or release liner is paper, humidity is another major factor, because the paper can gain or lose moisture. This can cause the liner to grow or shrink, resulting in curling of the material. For this reason, you may need to condition the media before using it allowing it to adjust and stabilize to your shop environment.
Test Cut. After you load the media in your plotter and before you run a job, do a test cut. Check that the depth of the cut is completely through the media but only lightly scoring the carrier or release liner. Make sure that you cannot feel the cuts on the backside of the carrier. Cutting too deeply is as much of a problem as not cutting deeply enough.
If you are cutting square shapes, one inside another, as part of your test cut protocol, check that the corner cuts are precise. And if you cut concentric circles, see that the lines meet cleanly after the blade makes a full circuit.
Troubleshooting. Plotter problems will occasionally arise. When they do, use the tips in this article to troubleshoot the problem. Through a systematic process of elimination, check the most likely causes. If you can’t solve the problem, ask for help. First, call your distributor. If he can’t answer your questions, he may refer you to the plotter manufacturer or the manufacturer of the heat transfer material.


