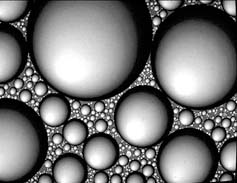
Have you ever seen the effects of outgassing paint on applied vinyl graphics? It’s not pretty. When the problem starts, it looks as if the surface of the film has had a breakout of severe acne. Tiny bubbles underneath the film grow until they merge together forming larger, more ominous bubbles.
This is a horror that no sign maker deserves. The problem will not go away with the passing of time. These bubbles will not breathe through the vinyl. Bad problems only get worse. And there is no remedy other than to remove the failing film and to start over.
In the worst case scenario, the vinyl graphics don’t come off so easily. Instead the paint comes off with the film. So you don’t think it can happen? It’s happened to me. And in each case the vehicle had to be repainted.
If you are applying vinyl graphics to a vehicle with a factory paint job, there’s usually no problem with outgassing. With repaint jobs, it’s a different story. Variations in paint formulations account in part for this application conundrum. Compound different types of paint with different skill sets and vastly different shop environments and the finished product is anyone’s guess. So what’s a vinyl applicator going to do?
For starters, it never hurts to visit the job site and inspect the vehicles. As you size things up, here’s what to look for:
- Which paint was used? Get the name of the paint manufacturer, the product series and any relevant product technical information.
- What is the condition of the paint job? In an inconspicuous part of the vehicle, check for paint adhesion using 3M Brand #610 Scotch Tape. In performing a paint adhesion test, apply a couple of inches of the tape to the painted surface and burnish down well. Then quickly jerk the tape off of the substrate at a 90º angle. If any paint comes off, you’ve got a problem. Either the paint has not cured properly, or for any number of other reasons, the paint adhesion is inadequate.
- Note: Older paint jobs can be a problem, too. On these painted surfaces, check for chalking, peeling paint, rust, etc. If any of these conditions exist, corrective action is required. And if the fleet owner is not willing to correct any of these problems prior to application of graphics, it’s best to pass the job up.
- When was the job painted? Just as inks are comprised of solvents, so are paints. Most paints such as lacquers, enamels and urethane cure after the solvent evaporates. Some paints, such as urethane, take days if not weeks to fully cure. This curing time varies depending on several factors. Some of these variables are the type of paint, ambient temperature and humidity, and the amount and type of hardener use.
Opinions vary on how long you should wait before applying vinyl graphics to a new paint job. The first thing to do is to “READ AND HEED” the paint manufacturer’s technical information. Each paint system is different and some take longer than others to cure. Most paints will cure adequately within a week at temperatures above 75ºF.
Mother nature, of course, doesn’t always cooperate with our time schedule. Lower than normal temperatures and high humidity can extend curing times. It’s not impossible for a paint to outgas for months. For this reason, if you can delay application of vinyl graphics to a newly painted surface, then do it. It never hurts to wait two or three weeks before installing vinyl films.
Test, Don’t Guess
If paints can continue to outgas for an indeterminate amount of time, how can you tell when the paint has cured enough to safely apply vinyl graphics? “TEST, DON’T GUESS.” To check whether or not a paint has cured, perform the following couple of common sense tests. First, press your thumbnail into the paint. If your thumbnail leaves an indentation, the paint has not yet cured.
If the paint passes the thumbnail test, then perform the film test. Apply a six inch square of polyester film onto the painted surface. After waiting for twenty-four hours, check to see if any bubbles have formed under the film.
Bubbles under the film indicate that the paint has not cured yet and is continuing to outgas. At this point you need to exercise a little patience. There’s nothing that you can do other than to wait. After two or three days, do another tape test. If bubbles don’t appear, you’re good to go.


