Floor Graphics

suzan_4222_1


Floor Graphics Represent a $2 Billion Market for the Sign and Point-Of-Purchase Industries. Jim Hingst Explains the Opportunities, Material Requirements and Application Techniques…

The Growing Market For Floor Graphic Applications

Walk into a grocery store and try not to notice floor graphics conveying an advertising message. This ground-level POP signage has gained popularity because it stimulates sales. That’s why so many grocery and discount stores use floor graphics to announce their hottest specials and introduce new products. Unheard of a few years ago, sales for this new medium are projected to reach $2 billion within five years.
Photo courtesy of Avery Dennison.

Photo courtesy of Avery Dennison.


Why Floor Graphics Are Effective

Consumers notice the graphics, read their messages and respond at the cash register. Floor graphics are as effective as more conventional POP displays in stimulating sales of impulse products, such as snack foods, by as much as 10%. Sales for some consumer products are reportedly 20-30% higher at stores with floor graphics.
Some of the success can be attributed to the medium’s novelty. Still, others believe that ground-level advertising is effective because most people naturally focus their eyes downward, looking where they walk as they push their shopping carts.
As an advertising medium, floor graphics complement and reinforce other advertising messages and campaigns. Compared to newspapers, outdoor advertising, radio and TV, floor graphics are cost-effective, with prices in the range of $12 per sq. ft. for the printed piece. By dovetailing with other marketing programs, floor graphics strengthen brand recognition. Plus, by reinforcing an advertising message, these graphics influence buying decisions — most consumers don’t choose which brand to buy until after they enter a store.

Other Markets for Floor Graphics

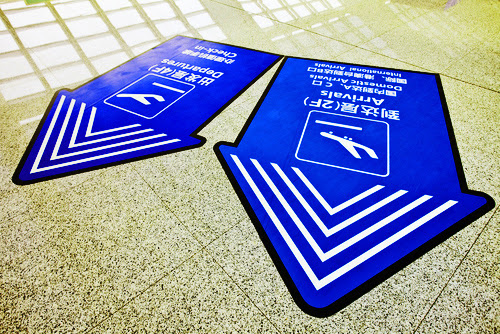
Grocery stores aren’t the only venue for floor graphics. Museums, shopping malls, nightclubs, airports and exhibit halls also use floor graphics to provide directions and promote products.
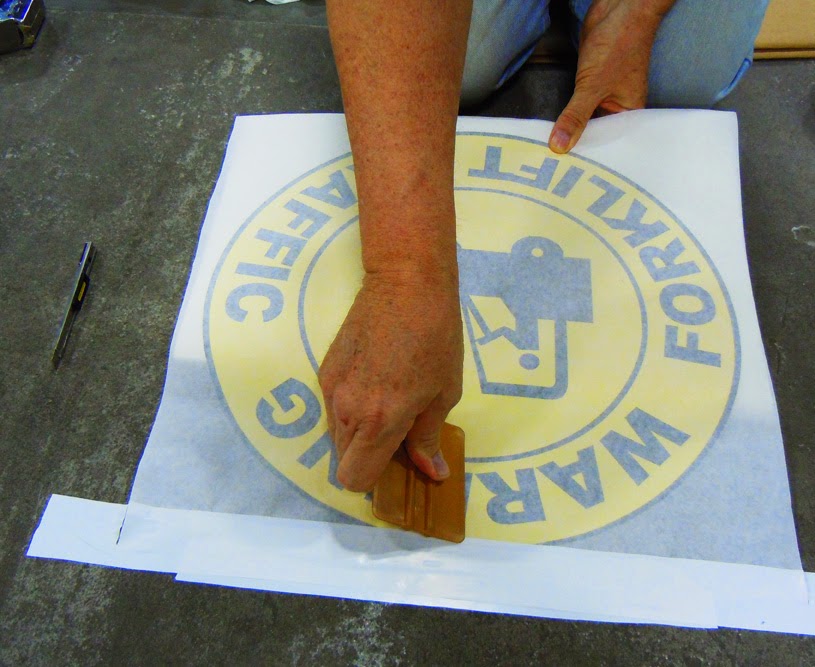
Sporting-event sponsors often use floor graphics as short-term sign- age, and, in warehouse or manufacturing environments, floor graphics can remind or warn workers of possible hazards.
With the floor-graphics market growing, a few companies specialize in this new form of advertising. Although large screenprinting shops produce many such programs, signshop owners aren’t excluded from this emerging market. Digital printing is ideal for short-run graphics for promotions or clearance sales.


When designing an identification program for small retail businesses, include floor graphics in the store’s décor package. They should be part of your standard sign program, along with window graphics, wall graphics, fleet identification and aisle signage.
Floor Graphics 101
Floor graphics are ideal for almost any store with smooth, nonporous flooring. Acceptable flooring surfaces include vinyl and ceramic tile, sealed concrete and finished hardwood floors.
When designing floor graphics, use big, bold and colorful graphics that will grab shoppers’ attention. Photos and 3-D effects successfully generate visual impact and buying interest, and die-cut graphics are usually more interesting — and effective — than square-cut patches. Lettering should be bold enough for consumers to quickly read, with simple layouts featuring minimal words to communicate messages most effectively. If possible, white and light colors should be avoided in the design, because scuff marks and grime are visible on light backgrounds.

Floor Graphics Materials

Companies such as Avery Dennison and 3M™ offer a wide range of materials for floor graphics. These materials typically entail a vinyl print-media layer and slip-resistant overlaminate that must meet demanding requirements. Various floor-graphics materials are designed for standard, digital-printing technologies.
Because store personnel often install the applications, select a user-friendly adhesive system. Ideally, the adhesive should reposition so the graphic can be easily installed at a wide range of temperatures. However, it must have a strong bond that won’t peel off the floor. When removed, the marking should detach with little or no adhesive residue.
Like screenprinted graphics, these substrates are often affected by temperature and humidity. Ideal shop conditions are ambient temperatures of 65-75° F and 45-60% humidity. When processing, the print media should be removed from its packaging, sheeted and allowed to relax at least 24 hours prior to printing. The conditioning period also allows the liner to stabilize by gaining or losing moisture.
FLOOR GRAPHICS

Overlaminates for Floor Graphics

Floor graphics must withstand the extraordinary abuse of foot traffic, dirt, grease, grit and chemical cleaners. Several overlaminates are specially designed for floor-graphics applications.
To ensure a floor graphic is slip-resistant, overlaminates are rigorously tested. The standard industry test, the American Standard for Testing Materials (ASTM) D2047 exam, checks the coating’s coefficient of friction. In layman’s terms, this is the force required to move one material over another. In short, the ASTM test measures the traction pedestrians could expect when walking on a floor graphic.
Polycarbonate and vinyl — most of which are pressure-sensitive — are often used as overlaminate films for floor graphics. Printed graphics should only be laminated after the inks are thoroughly dry. In high humidity, extra curing time may be required.
Heat-activated overlaminates are also available. Clear protective films can be applied to encapsulate the front and back of the paper print. The overlaminates overlap the print on all sides by 1/4 in. or more to form a waterproof barrier.
Polycarbonate films without an adhesive coating are also used to produce floor graphics. A mirrored or reverse image can be printed on the film’s second surface. After the ink is completely dry, a mounting adhesive is laminated to the print. In this construction, the film serves as both the print and overlaminate.
STREET GRAPHICS FILM 04 LO RES

Link to Vinyl Application Videos

Applying Floor Graphics

Installing floor graphics is similar to installing other pressure-sensitive, vinyl material. Prior to application, inspect floors for broken or loose tiles and uneven surfaces. To ensure good adhesion, floors must be cleaned using a commercial floor cleaner, such as a citrus-based product. Grease and tar can be removed with rubbing alcohol. Before the solvent evaporates, wipe the floor dry with a clean, lint-free cloth to prevent residue that could affect adhesion.

Use common sense when positioning the graphic. Although today’s overlaminates are durable, they won’t withstand continuous forklift and heavy-equipment traffic. In addition, graphics shouldn’t be installed in areas that may get wet, such as in an entranceway. While overlaminates must meet slip-resistance standards, wet graphics can become hazardously slick.

Floor-graphics applications should always be applied dry; never use application fluid. To prevent edge lifting, always squeegee the graphics’ edges twice. Following the installation, wax the graphics and floor surface to seal the edges and prevent moisture from seeping between the graphic’s layers and floor surface.

Visit My Vinyl Sign Techniques Community

CLICK HERE FOR HINGST SIGN POST ARTICLES IN PDF FORMAT
web photo 11Vinyl Application Videos

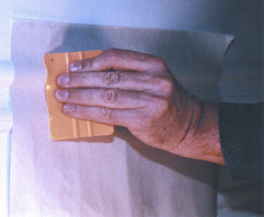
Squeegee Technique. Nothing is more basic in vinyl application than the squeegee. But some squeegees work better than others. And there are right ways and wrong ways to use this simple tool. This video clip reviews squeegee selection, squeegee care and squeegee technique. Click to Link
Wet Applications. Dry applications are typically recommended for most vinyl applications. For those exceptions to the rule, this instructional video explains the right way to perform a wet application. Click to Link
Application of Window Graphics. Installing vinyl graphics on glass can be challenging, because the adhesive aggressively grabs onto this high energy surface. Repositioning graphics on window is generally difficult, if not impossible. This instructional video explains how to dry apply window graphics right the first time. It also describes the necessary steps required for surface preparation. Click to Link
Transferring Frosted Window Graphics Films.  Because frosted window films are highly textured, transferring cut vinyl graphics can be problematic. This video provides direction in selection of the right application tape and how to apply these films quickly, easily and without problems. Click to Link
3-Step Surface Prep. This instructional video describes how to properly clean the surface of a vehicle before applying pressure sensitive vinyl graphics to a trailer or doing a full wrap of a car or van. This three step surface prep involves detergent washing, solvent cleaning and a final wipe down with IPA. Click to Link

Vinyl Application Over Rivets. Applying vinyl graphics on vehicle surfaces with rivets is challenging for most sign makers. Vinyl failures to these surfaces are all too common. This video demonstrates some tips and procedures, used by professional decal installers, which will make these demanding applications easier and more trouble-free.  Click to Link
Vinyl Application to Corrugations. Learn how to apply vinyl graphics to corrugations in a relaxed state. Forcing films into the valleys of corrugations puts too much mechanical stress on the film. Sooner or later, the vinyl will lift or tent in valleys. Click to Link


Applying Air Egress Vinyls. Vinyl films with air egress release liners have almost eliminated bubbles and wrinkles from applied graphics. Air egress release liners with their highly textured surface structure are problematic. Not much will stick to these liners other than the vinyl film. At RTape our best premask solution for air egress liners is a special Conform® tape called 4761RLA. Click to Link