You can use chip carving knives for more than just carving geometric designs in boxes, plates or furniture. These specialized knives are also great tools when used to carve incised letters. I have also used these knives for carving details in brittle wood prone to tear out.
In traditional chip carving, a knife is used to cut out two-sided chips or small triangular shaped pieces of wood. But chip carving knives are capable of so much more. What makes these tools useful when carving incised letters is their capacity to make precise cuts in precarious areas, such as the serifs of a letter or the thin stroke of the leg of a letter. In fact, the cuts made with a chip carving knife are so precise that you can carve small copy with nothing more than this specialized tool.
While there are many different types of knives available for chip carving, all that’s really needed when carving incised letters is a conventional knife as shown in the photo below. Two of the knives that I have are the Flexcut brand and the Wayne Barton brand. Each tool has its own unique features. The ergonomic design of the Flexcut knife makes it easy to hold for long periods of time. What I like about the Wayne Barton knife is that the blade is thinner, which allows the knife to more easily slide through the wood. Both knives are excellent tools and would make good additions to your woodcarving tool box.
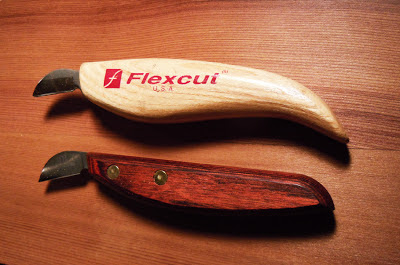
Regardless of what knife you buy, what is important is that it is sharp…sharp enough to shave the hair off of your arms. If your knife is not razor sharp, you need to sharpen it. In sharpening a standard cutting knife, the blade should be nearly flat against the sharpening stone. A rule of thumb is that the angle when sharpening should be no greater than 10⁰. Since both sides of the blade have a bevel, be sure to sharpen both sides. Ideally, when the blade is honed and stropped, it should have a mirror finish. The purpose of polishing the surface of the blade is to reduce its drag as you cut through the wood.
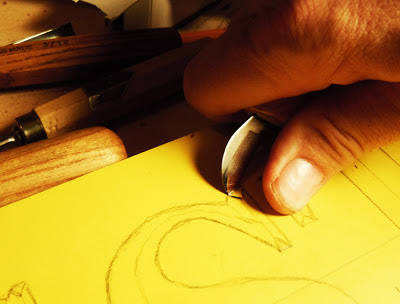
Safety tip: As you are holding the knife, make sure that you hold your thumb firmly against the handle of the knife and that the tip of your thumb is always on the wood surface. If you follow this rule, you are unlikely to cut yourself. See the photo below.
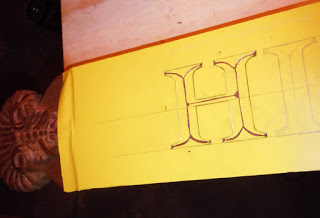
After transferring the design to the sign, I used the chip carving knife to notch the corners and serifs of the letters. These relief cuts in the corners of the letters prevent the wood from tearing out.
After cutting the triangular shapes in the serifs, you can also use the chip carving knife to cut a v-shaped gouge in the center of the letter. See the photo below. Of course you could also use a v-parting tool for this task. The gouge in the center of the letter serves as a stop cut as you carve from the perimeter of the letter to the center, using either a #2 or #3 gouge.
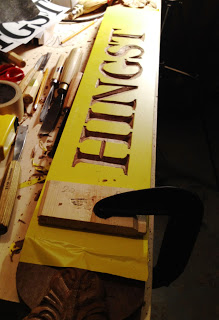
You will note in the photos that the board is covered with RTape’s yellow ProGrade™ paint mask. The masking is great for drawing your layout lines and copy. If you drew directly on a dark wood, such as cedar, you could not see the lines clearly. When using paint mask, if you make a mistake in your drawing, you can easily erase your error from the paint mask. Or you can just rip off the masking and start all over again. I have also used application paper to cover the sign. But paint mask works better because the gouges cleanly and easily cut through it. Paper, on the other hand, tears.
In addition to using chip carving knives in carving the incised letters, I also used them for much of the detailed work for the scallops.
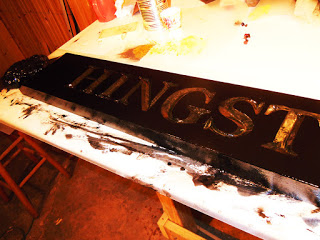
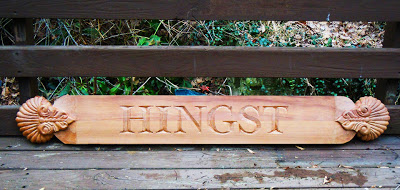
After carving, the sign is painted with two coats of primer and three finish coats. Then the incised letters and the scallops are coated with Le Franc 12-hour oil size in preparation for gilding.

If you are interested in learning how to carve incised letters, I recommend reading Paul White’s book, Carving a Traditional Cape Cod Sign. White is recognized as one of the most talented carvers in the nation. His book provides step-by-step instructions with plenty of pictures.


