ABOUT VINYLEFX® FILMS
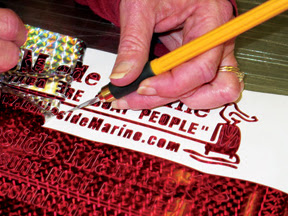
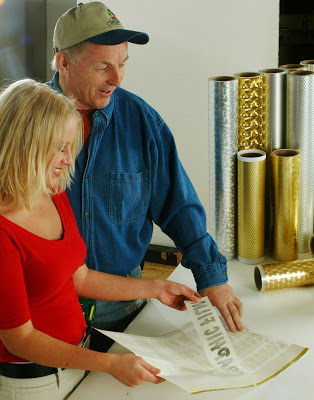
Eye-catching RTape VinylEfx® metalized vinyl media give your designs a distinctive look, which attracts attention and creates favorable visual impressions. Your graphics are noticed, read and remembered. That’s your competitive edge! The rich look of these metallic vinyl films is perfect for signage, POP, exhibits and store interiors.

For design ideas, click on this link.
Properly processed and applied, VinylEfx® Outdoor Durable Series films provide up to 3 years exterior life. Durability varies depending on environmental conditions, installation procedures, finishing, and product suitablity to the intended application.
For interior applications, VinylEfx® Decorative Series provides indefinite indoor life and short term exterior life. VinylEfx® Decorative Series films are not warranted for exterior applications.
Edge sealing is necessary for applications, such as exposure to drastic weather, marine or winter craft applications, etc. An overlaminating film is required for printed graphics used in outdoor applications.
VinylEfx® cuts as easily as most glossy, white calendered vinyls. For best cutting results, use a sharp 45° blade at slow cutting speeds with swivel type of cutters. Optimal cutting pressures vary depending on plotter type and blade sharpness. Typical pressure is between 135 grams and 165 grams. Downforce pressure, of course, will vary from one plotter type to another and depend upon the sharpness of the blade.
THERMAL DIE CUTTING
Cut at heat settings between 295 and 300⁰F (146 -149⁰C), and dwell times between 1/4 and 1/2 second.
Thermal die cut decals have slightly raised edges, which are prone to edge lifting. Edge sealing provides additional protection.
For detailed information on thermal die cutting VinylEfx® films, see my article: Thermal Die Cutting Tips.
For detailed information about screen printing on VinylEfx® films, see my story: Screen Printing VinylEfx® Films.
DIGITAL PRINTING INSTRUCTIONS & TIPS
VinylEfx® films are printable using a wide range of digital printing technologies. Waterbased inks will not adhere properly.
TEST, DON’T GUESS. Always test the vinyl with the ink system prior to production.
Print VinylEfx®using a profile for White Intermediate High Gloss Vinyl at lower temperatures (35-40⁰C). Using high printer temperature settings can cause VinylEfx® films to expand and contract resulting in tunneling on the release liner. Settings my vary from one printer to another and from one ink system to another.
Humidity and temperature control are critical! Make sure VinylEfx® is at room temperature (70⁰F/21⁰C) prior to printing. Colder ambient temperatures could extend ink curing time. Refer to ink manufacturer specifications.
Wiping down VinylEfx® with a lightly moistened towel prior to printing helps remove dust and other contaminants.
NOTE: Heavy concentrations of ink, especially ecosolvent inks, will contribute to shrinking and edge curl of VinylEfx®. Control your ink densities.
IMPORTANT: Allow at least a 1/4” (6mm) border around any printed image to minimize shrinkage. You may need to increase the size of the border for images with heavy concentrations of ink. NEVER cut into the printed image.
INSTALLATION & REMOVAL
VinylEfx® films are suitable for general purpose signage applications on CLEAN, SMOOTH, NON-POROUS, FLAT, VERTICAL SURFACES. VinylEfx® will not conform well around compound curves, corrugations and rivets.
If the application surface has seams (such as truck panels), you must cut the vinyl along these seams. After cutting the film, use the edge of your squeegee to tuck the vinyl into the panel seam.
Some substrates are problematic and could cause adhesion problems. For information on special adhesive systems designed for these unique applications, call RTape Customer Service at 1-800-440-1250. Please note the following about substrates:
• VinylEfx® will not adhere well to untreated low-energy surfaces, such as polyethylene and polypropylene.
• Some clear coats and automotive paints contain additives to repel dirt, grime, etc., which can cause adhesion problems.
• VinylEfx® and other metalized films (reflectives & polyesters) are not recommended for application to untreated metal surfaces. Dissimilarity of metals can result in galvanic corrosion.
• Know your paint system. Each paint formulation is different. Some contain additives, such as wax and silicone, which can cause adhesion problems.
• Make sure the paint systems is fully cured. If not, outgassing will occur and cause bubbles underneath the vinyl. Follow the paint manufacturer’s instructions for curing times.
• When applying VinylEfx® to another vinyl, a premium cast vinyl is recommended. The plasticizers in many intermediate vinyls can cause bubbles and adhesion problems later.
For detailed information on surface preparation, see my article: 3-Step Prep for Vehicle Graphics.
APPLICATION TEMPERATURE RANGE. Optimal ambient temperature for the application of VinylEfx® is 70⁰F (21⁰ C). Pressure sensitive vinyl may resist sticking immediately to very cold surfaces.
DO NOT APPLY WET. VinylEfx® films must be applied dry. The warranty is voided for wet applications.
USING APPLICATION TAPE & PREMASK
For plotter-cut VinylEfx lettering and graphics use a high tack application tape, such as RTape ApliTape 4075, or Conform® 4075RLA, 4076RLA or 4775RLA or Clear Choice® AT75. A mid-tack tape such as Clear Choice® AT60n works well for medium sized VinylEfx® lettering.
For most applications, use a high tack application tape, such as RTape 4075RLA to transfer plotter cut graphics. For thermal die cut graphics use an ultra-high tack tape, such as RTape 4885.
For digitally printed and UV screen printed wide fromat graphics, use a low tack premask, such as DigiMask Clear. These products are designed to remove cleanly from the printed image and not damage the print.
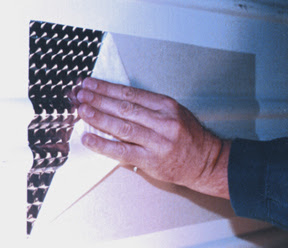
In removing the application tape, pull it at a 180-degree angle against itself. After removing the tape, always resqueegee the graphic.
After removing the application tape, always re-squeegee the entire graphic, especially the edges and overlaps to prevent edge lifting. To prevent scratching the VinylEfx® film after removing the application tape, use a low-friction sleeve on your squeegee.
EDGE SEALING IS RECOMMENDED. Using a fine-tip brush, paint the edges of the VinylEfx® film with a commercial-grade product.


