Jim Hingst provides tips to improve sign painting success and avoid paint failures. Tips include sign painting techniques and painting safety recommendations.
 1. Safety first. Before painting, always read and follow the safety guidelines in the SDS (Safety Data Sheets) bulletins, paint manufacturer’s data sheets and product labeling. At the beginning of every work day, take ten minutes to review these safety precautions with your employees.
2. When spraying primers, paints and clear coats, the ambient temperature of your shop or work area and the temperature of the substrate is absolutely critical. As a general rule of thumb, you should never paint in an environment, whose temperature is below 60°F or when the temperature of the substrate is below 60°F.
3. Nothing impacts the success of a painting project more than surface preparation. Before painting, take the time and extra care to clean the substrate properly.
4. Study the paint manufacturers’ literature and use this information a guide in selecting the appropriate primers, paints and clear coats for specific substrates that you are coating.
5. Mixing ingredients that are not matched for compatibility is a recipe for disaster. For best results and to minimize paint problems, it is best to use primers and reducers manufactured or recommended by the paint manufacturer.
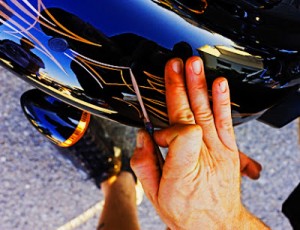
6. Shortly after painting, peel off masking tape and paint mask. The longer any pressure sensitive material stays on a substrate, the higher the ultimate adhesion builds, making removal more difficult. Leaving tape or paint mask on too long can result in pulling paint in the removal process.
Shortly after painting, peel off masking tape and paint mask.
7. To remove unwanted dried paint, spray the area to be cleaned with Easy-Off oven cleaner. After waiting a few minutes to allow the cleaner to dissolve the dried paint, wipe the substrate clean with a rag or plain paper toweling. Old painted lettering can also be removed using this process. If the old paint does not remove after the initial application, spray the substrate again with the oven cleaner. To remove hand-painted lettering on vehicle substrates, sign painters have long used “Easy-Off” oven cleaner. To date, no one has come up with a more effective solution. An alternate solution is using lighter fluid. As a word of caution, when using any chemical on a vehicle surface, test, don’t guess. Apply some of the chemical to an inconspicuous part of the unit, and check for any softening of the paint, discoloration or loss of gloss.
8. Whenever you paint or screen print on a substrate, keep a record of what type of paint or ink was used and the color formulation. Maintaining this information will ensure that you can match colors on repeat orders.
9. Clear coating gives your signs added protection against abrasion and the degrading effects of rain and sunlight as well as a high gloss finish. There are a variety of clear coats on the market. These include acrylics and urethanes. For the best protection, some sign makers will spray their graphics with an automotive acrylic urethane clear coat. The urethane clear coats use an isocyanate based catalyst that harden the resin. Because of the extreme health hazards, you must always use a professional grade respirator when spraying paints and clear coats with isocyanates. Clear coat is not the same as varnish. Varnish contains hot solvents that can penetrate the facestock of vinyl graphics and attack the adhesive system, causing the graphics to lift and peel. Varnishes typically provide limited protection against ultraviolet light. Some varnishes degrade very quickly when exposed to the outdoor elements, providing no more than a year of outdoor durability.
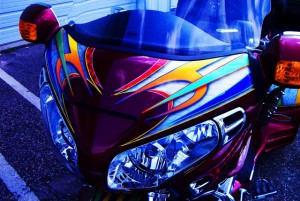
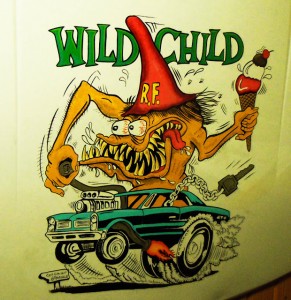
To protect the painted ghost flames, pinstriping and applied graphics, airbrush artist Jimmy Jackson protected his artwork with four coats of a urethane clear coat.
10. Most customers love a high gloss finish. The smoothness of a paint’s finish determines its gloss level. A perfectly smooth surface reflects 100% of the light shined on it and appears very glossy. A textured surface, on the other hand, scatters some of the light shined on it and consequently appears less glossy.
Most automotive-type of polyurethane paints dry to a very smooth, high gloss finish. To “tone down” the gloss level, a flattening agent can be added to the paint. The flattening agent consists of very tiny particles, that give the paint some texture.
11. To help your customers select paint colors, keep a color card handy. As useful are these charts are, they will only show an approximation of how the actual painted color will appear. The only way to show true paint colors is to create your own display.
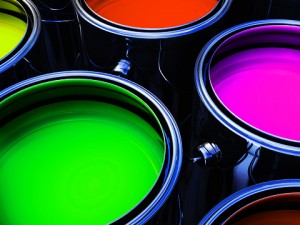
To help your customers select paint colors, keep a color card handy.
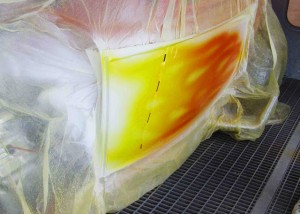
12. In thinning paint, many sign makers use mineral spirits. A better choice is to use the reducer manufactured specifically for the paint. Always thin the paint according to the manufacturer’s recommendations. For example, for their lettering enamels, 1-Shot Paint Co. has formulated three reducers: 6000 Reducer, 6001 Low Temp and 6002 High Temp Reducers. These products are designed as flow enhancers for use at normal, low and high temperatures, respectively. The type of thinner used can affect the rate at which the paint dries. If the paint dries too quickly, its finish can become mottled. When this happens, the remedy is to use a slower thinner, which slows the curing process.
Temperature affects a paint’s flow characteristics. 1-Shot Paint Co. has formulated three reducers, designed as flow enhancers for painting at different temperatures.
13. Before repainting, make sure that the substrate, especially wood, is thoroughly dry. Painting over a wet substrate can cause the paint to eventually blister as the moisture comes out of the wood.
14. Regardless of the paint you are using, it is generally best to spray or dust on several light coats. This is especially true when using the water based paints. Heavy coats of paint not only can run, but they can also shrink. When hand painting, you should put a thick coating of paint on the surface. Paint which has been thinned out excessively, will not withstand the bleaching effects of UV light.
When spray painting or airbrushing, it is best to spray light coats of paint.
15. “Test, don’t guess.” Painting involves variables. Lots of them. These variables include the substrate, the primer, paint, clear coat, your procedures and your shop environment, which can vary in temperature and humidity as the seasons change. Before you use new materials and new techniques, play it safe and test the coatings on a scrap piece of the substrate to ensure your success on a real job.
16. Some paints contain additives that control the growth of mildew; some don’t. If you need to clean mildew off of an old sign before painting, here’s a concoction that should work for you. Mix one part of bleach with three parts waters. Use a stiff brush to scrub the affected surface with this mixture. After cleaning the substrate with the bleach mixture, wait about ten minutes before rinsing off the sign with clean water. SAFETY TIP: Always wear safety goggles and chemical gloves when working with bleach. Do not mix ammonia with bleach. This mixture produces a poisonous gas that could kill you.
17. If you are redoing a sign, and there are cracks or gouges in the surface, you must fill these in before repainting. Unfilled imperfections in the sign surface are unsightly and are also points where moisture can be absorbed by the substrate. There are a couple of different ways that sign makers fill cracks. Some will apply construction adhesive into the cracks. Others will use an exterior grade wood putty. Do not fill any of the cracks with silicone, because paint often does not stick to its slick surface.
18. When airbrushing with 1 Shot lettering enamels, a good mixing ratio to start with is 60% reducer and 40% paint. Typical air pressure for airbrushing will be between 35 and 45 psi.
19. When airbrushing, make sure that you wear disposable latex gloves and an air respirator. If you have large hands, you can buy the extra large latex painter’s gloves from www.autobodystore.com. These painter’s gloves are also a little thicker than the standard white gloves, so they hold up better.
20. Many colors of paint will dry darker than they appear wet. For this reason, when you are mixing a color, its value should be a little lighter in liquid form, than what you would like to end up with.
21. Many sign painters will remove the vinyl paint mask within 15 to 20 minutes of painting, while the paint is still wet. If you wait too long the top of the paint can scale over and causing some of the paint to tear off when removing the masking. Be careful when removing the paint mask, so the vinyl masking does not touch the wet paint, damaging your paint job. Take the time to remove the masking or you will need to spend additional time fixing up your screw ups. Even if you are careful, screw ups happen, so keep the colors that you have mixed for a job for touch up work. If you try to remix colors, they will never match exactly.
22. Keep an design idea journal or sketchbook. When you see a good looking painted sign or pinstriping design in a magazine, clip it out and paste it in your sketchbook. Also use the sketchbook to keep notes about color combinations that you think work.
23. Do all of your painting inside. This minimizes the chances that airborne contamination will end up on your paint job.
24. Do not mix different brands of paint. The different components of a paint system are matched for compatibility. Mixing incompatible components may cause a chemical reaction with disastrous results.
25. Only use a high-quality masking tape. Cheaper masking tapes can tear prematurely or allow paint to bleed underneath the edges. After applying masking tape or paint mask vinyl always re-burnish the masking before painting to ensure that everything is stuck in place.
26. Always buy the best quality paint, and then read and follow the manufacturer’s recommendations. For a durable paint job, you will need one to two coats of primer and two to three coats of paint.
27. Solvents are designed to thin the viscosity of a paint. There are all types of solvents including mineral spirits, lacquer thinner, acetone and reducers. These solvents are not the same and cannot be used interchangeably. Before using any solvent to thin a paint, make sure that you read and follow the paint manufacturer’s technical bulletins.
28. GETTING THE BUGS OUT. As your paint is drying, invariably you will end up with either bugs or airborne debris settling on your beautiful paint job. Using tweezers, you can pick some of this unwanted material from the finish. In other cases, you will need allow the paint to dry and sand the damaged areas and re-shoot the paint job.


