Chemical welding is an inexpensive way to seam banners and it’s longer lasting than banner tape. But there’s also something to be said for RF and heat welding processes that last much longer than brush-on solutions.
Using banner tape as a seaming mechanism is great for a short-term solution. But let’s face it. Banner tape won’t fly with long-term applications.
If you want the banner to live beyond the grand opening or special sales event, then you need to take a seaming approach that will stand up to the wear and tear of wind and rain. The last thing you want to do is sell your customer a banner that falls apart in a few months.
That doesn’t necessarily mean you need to turn to complicated stitching alternatives just yet, though. You can venture into the world of chemical welding. Larger shops may even choose to invest in Radio Frequency (RF) or heat welding equipment.
As its name suggests, chemical welding depends on chemical fusion. It entails dissolving together the two portions of the banner with a volatile solvent. You can brush it on, pour it on or squirt it on, then press the two portions together. The results are similar to thermal welding. The good news is it doesn’t take much skill to successfully use chemical welding. Still, there are a few tricks of the trade and a few important safety precautions to go along with them.
The Weld
Much of the sign industry uses a chemical weld known as HH-66 from R-H Products Co. This is a vinyl cement used as a contact adhesive for PVC vinyl products. This type of adhesive is commonly called a Bodied Adhesive or Bodied Solvent.
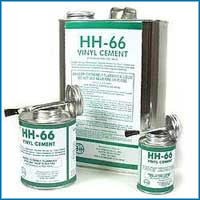
When properly applied, R-H Products’ tests show HH-66 provides a super strong, waterproof, flexible bond. It is designed to be highly resistant to temperature and weather extremes, and is excellent for patching and sealing vinyl, according to the company. So while it may not stand up to long-term exposure, your customer should be fine if there is a heavy gust of wind on opening day.
Chemical weld is sort of like industrial strength glue but it’s not glue. Glue forms a distinct layer between the two pieces of banner. Plastics found in glue, such as epoxy and acrylic, are modified to make it sticky. But that modification reduces the lifespan of the glue. Chemical weld offers a more permanent solution.
“There is actually a very distinct difference between the chemical weld and glue. Glue is simply a very sticky product that makes two pieces stick together. Under stress that glue can release either from itself or from one of those two surfaces,” explains Doug Mier, a Dallas-based sign expert with FASTSIGNS International.
“With a welding solution you literally meld the two surfaces together so that they become one surface,” he explains. “It would be like the difference between using a bolt and a mechanical fastener to hold two pieces of metal together versus literally welding them together.”
Applying Chemical Weld
As with anything vinyl, the manufacturer recommends cleaning the surfaces before welding. If you don’t clean the surface properly, then you could wind up leaving behind contaminants that negatively impact the weld. This is a basic step, but one that many sign makers skip. Experts recommend using isopropyl alcohol on the surface and wiping it clean with a cloth. Other cleaning agents could attack the vinyl.
For optimum results, HH-66 should be applied by brush, although a roller may be used. You need to apply one coat to each surface. Then, you make the application using roller pressure to mate coated surface to coated surface. Although you can bond the material while it’s wet, you’ll get the best results if you wait three to five minutes before bonding the surfaces together.
“You literally brush on the chemical weld like glue and put the two pieces together, then let them dry,” Mier says. “Chemically welded seams require a waiting period to cure in order to reach full strength. That’s important.”
Chemical Caution: Handle Safely
Chemical weld may not cause sparks to fly, but it can be dangerous if not handled properly. These cements contain solvents that are classified as combustible. That means you need to keep them clear of sources of ignition, like sparks, heat and open flames. You should keep the can tightly sealed when you are not using the weld.
Manufacturers recommend using a ventilating device, such as a fan or air mover, when using chemical weld in limited ventilation areas. You can also use an air-purifying NIOSH-recognized respirator. Be sure to rule out any possibility that your ventilator could be a source of ignition. What’s more, if these solvents come in contact with your bare skin it could cause irritation. Manufacturers recommend wearing gloves while applying the weld.
RF Welding or Heat Welding?
RF welding, on the other hand, fuses materials together by applying radio frequency energy to the area to be joined. The resulting weld can be as strong as the original materials, if applied properly. RF welding is much stronger than chemical welding but it’s also much more expensive because it requires specialized equipment.
RF welding depends on properties in the banner to generate heat in a rapidly alternating electric field. The process requires the banner to be joined with a high frequency of 13-100Mhz electromagnetic field. It is typically applied between two metal bars that apply pressure during heating and cooling. In scientific terms, the dynamic electric field causes the molecules in the banner material to oscillate.
Hot air and hot wedge rotary heat sealing are two additional processes used to join materials. Just like it sounds, it uses principles of heat, speed and pressure to get a welded seam.
The solution you choose depends on your needs and your budget. Banner tape and chemical welds are by far the least expensive methods by which to seam banners. However, RF and heat welding offer an obvious advantage: greater longevity. If you are breaking into bigger jobs that require RF and heat welding but can’t afford to shell out the bucks for the gear, you can always outsource this aspect of the project or you can stitch the seams with a sewing machine.
Stitching seams is the subject of the next article in this three part series on seaming. Stay tuned for tips and tricks on how to avoid ugly butt seams.
As seen on signindustry.com


