Stick It In Reverse
How you apply an application tape to a vinyl graphic or a HotMask™ transfer tape to a printed heat transfer applique can affect the appearance of the finished product. If you get wrinkles or bubbles in the paper application tape, I can just about guarantee that you will get wrinkles and bubbles in the applied vinyl.
You don’t believe me? The next time that you wrinkle the application tape or entrap a bubble, remove the release liner from the vinyl and look at the adhesive side of the film. You will see that wrinkles and bubbles have already started to form. At this point, no matter how accomplished you are as an installer, the wrinkles and bubbles have already formed and you will transfer them to the application surface. The good news is that the tiny bubbles will usually breathe out through the film. And if you get a big bubble, you can easily pop those with a pin and press them flat with your thumb. When you get wrinkles, it is a whole different story. Wrinkles are there forever. That’s because a wrinkle occurs when the vinyl sticks to itself.
Applying HotMask™ transfer tape is equally important. If you entrap a bubble in the film over a printed applique, the shape of the air inclusion could manifest itself in a telltale impression after the applique is heat pressed. Impressions of these inclusions are very apparent over the dark areas of a print.
The best way to apply application tape on a graphic is with a laminator. But what do you do if you don’t have one and you have to apply the tape by hand? Applying a tape to a large graphic can be challenging. There is, however, an easy way to get the job done with a minimum of problems. I call this method “stick it in reverse”. Here’s how to do it:
- The first step to preventing bubbles from forming is to always work on a perfectly smooth work surface. When I worked for fleet graphics companies, we always worked on glass covered tables. If you are working on an old wooden tabletop covered with cut marks, you will likely generate bubbles.
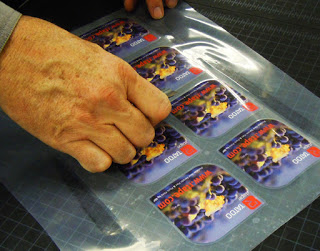
- Unwind the application tape or HotMask™ so that the adhesive side of the tape faces upwards and the facestock is against your work surface.
- Turn the weeded graphics so that the vinyl film faces down and lay the graphics panel on top of the sticky side of the application tape. See the photo below.
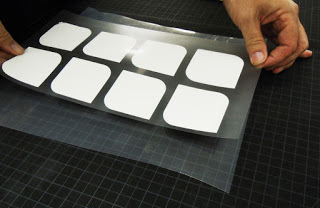
- Starting in the center of the graphics panel, use your plastic squeegee to laminate the film to the application tape or HotMask™. Starting in the center of the graphic, squeegee one side and then the other. To prevent bubbles form forming between the tape and graphics, apply firm squeegee pressure and overlap your strokes. See the photo below.
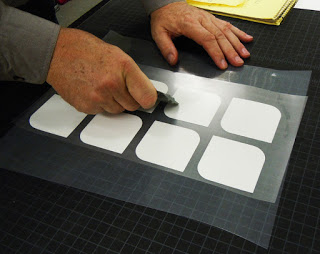
- After completing the first step in the laminating process, turn the graphics panel over so the application paper or HotMask™ film is on top. To complete the laminating process, use the plastic squeegee to resqueegee the entire graphic. See the photo below.