Here are some helpful tips for working with application tape:
- Whether you laminate application tape by hand or with a laminator, avoid trapping air bubbles between the vinyl graphics and the application tape. Bubbles and wrinkles in the application paper often result in bubbles and wrinkles in the applied graphic, regardless of the skill and effort of the installer. If you inspect the adhesive side of a graphic, after removing the release liner, you often can see the formation of wrinkles and bubbles in the adhesive. In the application process, you will just transfer these wrinkles and bubbles to the substrate.
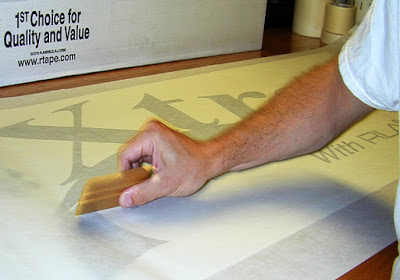
Avoid trapping air bubbles between the vinyl graphics and the application tape.
- In the lamination process, avoid stretching the application tape. Stretched tape usually shrinks, causing the vinyl graphic to curl.
- If you can afford a laminator for your shop, it’s a worthwhile investment. If the laminator is set up properly, you will apply application tape to graphics with a minimum of wrinkles and bubbles. The next best alternative is to buy some type of application tape dispensing system. Three, that I have, are the WEBERmade dispenser, the Mask-Rite tape applicator and the new ProRoll Application Tape Roller from Image One Impact. The WEBERmade system bolts right on to your workbench with a couple of clamps. What I like about the machine is that it has a clutch, which allows you to adjust the unwind tension of the roll. The Mask-Rite tape system works differently. It consists of two rollers which the application tape feeds through. You simply roll the application tape over your graphics. The ProRoll Application Tape Roller is described in my article: Image1Impact Introduces a New Tape Applicator.

The new ProRoll Application Tape Roller from Image One Impact aids lamination of tape to graphics without wrinkles and bubbles.
- Use a single sheet (rather than overlapping pieces) of tape to cover the graphic. Otherwise, a fine line of tiny air bubbles will appear in the applied graphics where the pieces of tape overlap.
- For screen printed and digitally printed decals, thoroughly “cure” inks and clear coats before applying the tape. Solvents in uncured inks and coatings often cause the decal and tape to adhere to each other, making it difficult to remove the tape once the graphic is applied. Solvents can even cause ink to delaminate from vinyl during tape removal.
- For screen printed or digitally printed graphics curing the ink system is critical. You may not want to hear this, but the rule of thumb is to wait 24 hours, allowing inks to thoroughly dry, before clear coating or overlaminating. Then wait 24 hours before applying the application tape and trimming the print.
- After a vinyl graphic has been “taped”, it should be applied shortly thereafter. Prolonged storage can increase the bond between the tape and the vinyl, making tape removal difficult following application. This condition worsens if the graphic is stored at elevated temperatures.
- Wet applications generally require more time for the vinyl’s adhesive to bond to the substrate. This means that you will need to allow more time before removing tape. It’s best to apply the graphic dry, if you can. If you must use application fluid, use the least amount to accomplish the job.

When using application fluid, use the least amount to accomplish the job.
- If an application paper tape isn’t releasing easily following an application, lightly spray the paper with application fluid, wait about 30 seconds, and then remove it. The application fluid will penetrate the paper facestock and soften the tape’s water-based latex adhesive, causing it to release more easily from the graphic. See my story: The Right Way to do a Wet Application.

To facilitate the removal of paper application tape spray the tape with application fluid and wait 20 to 30 seconds before removal.
- In removing the application tape, carefully pull the tape 180° against itself. This tape removal procedure prevents you from pulling the graphic off of the substrate. To minimize edge lifting, use a squeegee covered with a low friction sleeve to resqueegee the entire graphic, especially the edges. The low friction sleeve will prevent the squeegee from scratching the graphic.
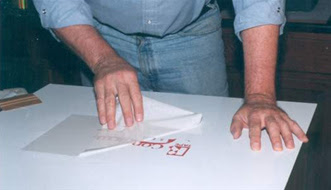
Remove the application tape by pulling it 180⁰ against itself.


