With the right film, the right application tools and the right techniques, vinyl graphics can be applied to textured wall surfaces such brick and concrete block. Many of old time decal applicators would heat a cast vinyl with an industrial heat gun, and burnish the hot, pliable film into the textured surface using a rivet brush for this job. Usually these applications were unsuccessful. Although the installer may have heated the film to the recommended temperature, by the time he burnished the vinyl with the brush, the film was cool again and would stretch back to its original shape. New tools, however, have been developed to make these challenging applications faster, easier and more secure.
Applying the right amount of heat is also key to a successful application to a textured wall. “For anyone just getting started in vinyl applications, don’t even think about using a hair dryer,” says Boxeth. “Applications to textured surfaces require heat. If you don’t heat a cast vinyl to the right temperature, you won’t break the memory of the film.”
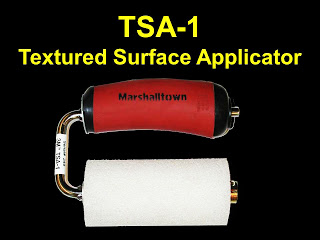
To properly apply the film you will need some type of foam roller. 3M has developed several different types of rollers, which will allow an installer to quickly apply large areas of some cast vinyl graphics to textured surfaces.
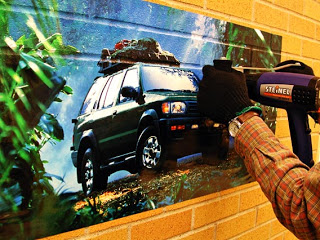
The photograph above shows an installer using the TSA-1 to apply a cast vinyl film to a concrete block wall. Photo courtesy of 3M.
At these high temperatures don’t worry about burning the film. The temperature of the vinyl only reaches 200 ºF to 250 ºF (94º-121ºC). That’s not high enough to damage the film, but it is high enough to melt the vinyl. In a sense, you’re just thermoforming the film to the texture of the wall. When working with a heat gun, you should worry about burning yourself. To avoid any mishaps, especially for those of you who are accident prone, spare yourself any agony and wear heat resistant gloves.
Also, be careful of the direction that you point the heat gun. It should be directed at the vinyl film and not at the roller. Excessive heat will destroy a very expensive tool. Boxeth also cautions that you take your time when applying film to textures. If you are applying the graphics at a rate faster than 50 square feet an hour, you are working way too fast.
If you are installing the graphics to a brick or concrete block wall, you will then need to apply the film into the mortar joints. For this application, 3M developed their TSA-2 soft foam bevel-edged roller applicator. The soft roller conforms better to mortar joints, textured wall surfaces and withstands high application temperatures. Plan the sequence that you will use in applying the film to the joints, so you don’t trap air between the joints. If you do, don’t worry. Just puncture any air bubbles with an air release tool and then apply the film into the recesses with the TSA-2.
Be aware that there are many different types of mortar joints. Some are flush with the brick or block and are no problem. Concave and v-shaped are also “doable” if they are not more than an 1/8” deep. That’s what the TSA-2 is designed for.
Many of the other types of mortar joints can be problematic. These include raked joints, those with an undercut profile and textured joints, in which the mortar has squeezed out between the bricks. In the building business, we referred to this as “weeping mortar”. That’s the polite terminology. The slang that the masons use for this, however, is “snot joint”.
For all of the problematic joints, you will need to cut the film at the joint with a sharp utility knife or Olfa knife and weed the film covering the joint.
For higher speed wall applications, 3M introduced the TSA-4. Some affectionately refer to this device as the “Rock ‘N Roller”. (I like that name. It has more sales appeal that TSA-4.) This two-handled roller allows you to put maximum pressure on the graphic as you are applying the film.

So how do you hold the heat gun with two hands on the roller? It’s a trick question! You don’t need to. The TSA-4 has a slot in which you clamp your heat gun. Secured in place, the heat gun is always at the right distance from the surface of the graphic and from the roller. This allows the installer to concentrate on the job at hand.
With the right materials, proper planning, training and an investment in the right tools, you can be rock’n and roll’n in the wall graphics market, too.


