It’s Not Just Window Dressing
We all know that the economic recovery is anemic – arguably the worst recovery since the Great Depression. Drive through any business district in any town and you will witness one vacant storefront after another. A conservative estimate is at least 10% of our nation’s retailers are in financial trouble.
So what’s the good news? Some producers of retail graphics busier than ever. Why? “The retailers are scared to death,” I was told during a visit to a large graphics printer, “which is why they’re investing in anything that will get shoppers into the stores.”
The good news is that you also have a tremendous opportunity selling store graphics. In this story, I will cover some of these opportunities, which include window treatments and graphics for window displays.
You may not need to look very far for these new opportunities. Your best prospects for store graphics are any of your customers, who you are currently selling, with store locations.
If your existing business base isn’t fertile enough ground, add car dealerships, gas stations, beauty salons, convenience stores and grocery stores to your prospect list.
Because the small, local retailers are often overlooked by you and your competitors, targeting these lower profile opportunities may bear more fruit than the bigger high profile prospects. When pursuing these accounts, the competition is much less fierce and the profit margins are generally much better.
Emphasize The Benefits.
A few tried and true methods to prospect for new business include telemarketing, social media, direct mail and networking. All of these tactics will help you build store graphics business, if you use them consistently in your sales efforts.
Once you gain an appointment with a prospect, here are a few benefits of a window graphics program that you should emphasize:
- Attract Attention. A store site visually competes for attention with hundreds of other store locations. Located in a strip mall or on a busy city street, and sandwiched between other stores, it is easy for a business to be lost. Colorful window graphics helps the retailer catch the eye of the passer by, along with focusing attention on any products displayed in the windows.
- Cost-effectively remodel the appearance of a store location. According to realtors, a critical factor in selling a home is what they call “curb appeal”. That term refers to the initial impression that a prospective buyer has of a home from the street. The same holds true for the retailer. First impressions are lasting impressions. Shoppers immediately form a judgment about a company based on the physical appearance of a store location. If the store doesn’t look inviting on the outside, shoppers will not be enticed inside. Rehabbing the appearance of the store with window graphics is much less costly than traditional construction costs for remodeling.
- Create a uniform look. A window graphics program will project a uniform corporate identity from one location to another, even if the stores are architecturally dissimilar.
- Reinforce the corporate identity. Window treatments can complement and reinforce the corporate identity. Graphics should be consistent with the company’s corporate colors, logos, design motifs and advertising themes. Over the years, McDonald’s has effectively used window graphics, such as the “Golden Arches” and Ronald McDonald, to strengthen their corporate identity and image.
The Sales Interview.
In developing a window graphics program that satisfies the needs of the store owner, your designer needs good information. Before going on a sales call, be prepared by doing some precall planning and take the time to visit the location. Don’t forget your camera with you and take plenty of pictures. If the store owner has several locations, you may want to visit some of the different stores. If you are approaching a smaller chain, the chances are that the architecture will vary from one location to another.
Once you conduct your initial sales interview with the prospect, be prepared with questions to initiate and sustain a dialogue. Here are few questions that you may want to ask:
- What are the company’s existing corporate colors, logos and design motifs? What liberties can the designer take?
- What changes to the store’s identity are planned?
- What are the company’s key advertising and marketing themes?
- How are they perceived by their typical customer? How would they like to be perceived?
- Which of the store’s product lines are the fastest moving and most profitable?
- Who are the company’s primary competitors?
- What challenges does the company face in the future from these competitors?
- What are the company’s plans for future growth?
In addition to helping your designer, the answers to these questions, will help you better understand the prospect’s business and his competitive environment. This will help you prepare your sales proposal.
Window Layouts.
Graphics producers have used several different “tried and true” formats in designing window graphics programs. Three popular formats are the valance, the showcase and the pictorial.
Valance. I am frequently asked what part of the window is the best to decorate. In most cases, I recommend a decorative band along the top of the window. Here are my reasons:
- In a strip mall, parking spaces are often located right in front of the stores. Any decoration on the bottom portion of the windows is blocked by parked vehicles. By decorating the top of the windows, graphics are usually visible from the street. Make sure that any overhang, canopy or awning does not obscure the graphics.
- The space at the top of window is usually unused dead space. A decorative valance is also useful in concealing lighting fixtures above a window display.
- Some store owners are concerned that youthful miscreants will vandalize their window graphics. Rarely are these fears realized. Still, if this is a concern, applied graphics at the top a window are out of reach.
Showcase. The showcase is one of the most effective window graphics design formats that you can use. It forms a border along the perimeter of the window. The primary function of this format is to frame all of the design elements within it and to visually tie the design together. This layout is especially effective in focusing attention on window displays. Decorative borders along the sides of the window should be narrow, typically no more than six to eight inches in width, so that they do not visually compete for attention with a product display.
Pictorial. We all know that a picture is worth a thousand words. In recent years, store owners have used large format pictorials printed on perforated vinyl films to transform their windows into billboards. Large format pictorials with bright colors have visual impact that attracts attention to a store location.
The one-way vision perforated films allow passers by to view the graphic but not see into the store. Customers on the inside of the store can see outside. The perforated films also allow light into the store, so it doesn’t feel like a dungeon indoors.
While large format graphics can be effective, you don’t need to cover every inch of glass with vinyl graphics. In some cases, covering the entire window with a pictorial can erect a barrier between the shopper and the interior of the store. The objective of a window graphic is to attract attention of the viewer; draw attention to the shop owner’s merchandise; and to give the shopper a reason to walk through the front doors.
Window Displays.
After graduating from grad school, I worked as an assistant store manager for Jarman’s shoe store in Chicago’s Loop. Every couple of weeks, I had the job of arranging the displays in the window. Wasn’t that overdoing it a bit? Not at all. The business survived on its walk-in trade. And our best merchandiser was the window display.
According to the Point Of Purchasing Advertising Institute (POPAI), window displays account for about 25% of a store’s sales. Depending on which industry report you read, the typical shopper spends an average of 6 to 11 seconds looking at the merchandise in a store window. Had I only known then, what I know today, I would have done things differently.
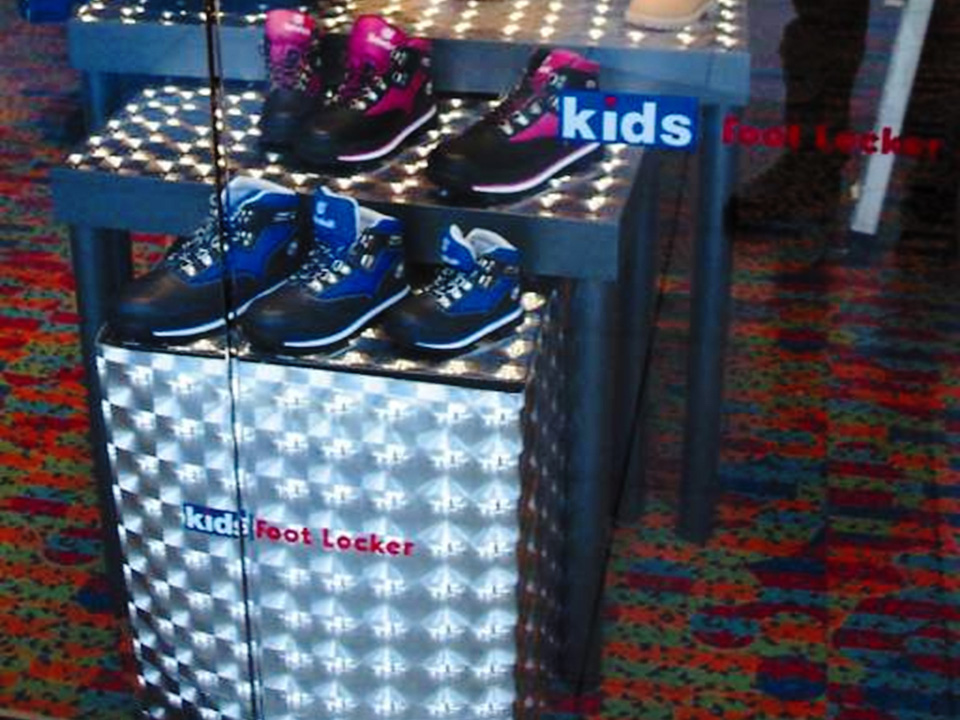
Window displays account for 25% of store traffic. Kids Foot Locker used Silver MultiLens to attract the shoppers’ attention, stimulate interest in their products and entice shoppers to enter their stores. The results was higher sales and profits.
The big department stores have turned the decoration of their windows into an art. Often compared to theatrical productions, the primary purpose of window displays is to attract the attention of the shopper with interesting and creative product arrangements, then lure the shopper into the store with the latest and hottest selling products.
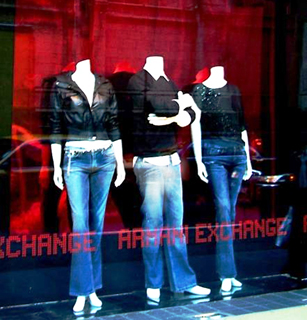
VinylEfx® Chrome Cherry Red was used as a decorative, eye-catching accent for the window displays of Armani Exchange during the 2004 Holiday Season.
That’s the toughest part, getting a new shopper into your store. Here’s why. People are creatures of habit. They go to the same stores over and over again. For the retailer to break their patterns of behavior, he has to do something dramatic. Scenery, lighting, props and the stars of the production, the mannequins, can set the stage for an effective product display.
The smaller retailers don’t have a display artist on staff. Here’s where you, the sign maker, can help the local shop keepers by providing materials for their displays. These materials might include digitally printed background scenery.
Large format digital prints can show products in use and they can set the stage for the display to create an atmosphere which sets the mood for the shopper. Using metalized specialty films is also effective when used for eye-catching backdrops.
Window Graphics Design Tips.
Some of the same principles that apply to print advertising and good sign design also apply to creating either an interesting window graphic or an enticing window display.
The first rule of thumb is to keep the layout simple. Too many words, colors and design elements create visual clutter. This advice also holds true for merchandise displayed in the window. The display should not be over crowded with products. To maintain visual interest, products should be displayed at various heights.
You have probably have heard designers talk about “white space” or “negative space”. These terms refer to the unused open areas of a layout. Any type of design needs some visual breathing room. This open area should represent 30% to 40% of a design. The tendency, though, is to throw everything into a layout including the proverbial kitchen sink.
If your design includes copy, keep the message short and sweet. Lettering should be big and bold and easy to read at a distance. Remember that, when using a block-style letter, the maximum viewing distance for 1-in.-tall characters is 25 ft. Small copy and fine detail are generally ineffective, especially if they’re printed on perforated window sheeting.
Keep your design modular by dividing the overall layout into smaller sections. If you are applying the window graphics at several different stores, with windows of different dimensions, the modular components will allow you to more easily improvise and adapt the design from one location to the next. Typical modules might include various striping sections, the company logo, company name, product or service offerings and slogans, store hours and a pictorial.
In designing window graphics, lighter colors are much more visible on glass than darker colors. If you must use a dark color, because it is part of the corporate color scheme, outline it with a white border.
There’s another reason to avoid dark colors, such as black and chocolate brown. Dark colors can absorb the sun’s heat, causing vinyl-covered glass to rapidly expand while cooler areas stay rigid. With part of the window expanding and other areas contracting, glass breakage is possible. Large areas of dark color next to regions of very light, reflective tones can also cause heat gain and glass expansion. Films with extreme gray-scale differences can result in glass fatigue and early failures.
Reflective sheeting applied to glass also poses a breakage hazard. The rigidity of stiff, reflective material may not allow the applied area to expand at the same rate as uncovered areas.
Vinyl Film Selection.
The material that you select for a job will depend on a couple of factors:
- With respect to durability, what are the customer’s expectations? Several calendered vinyl films that will provide one to three years of outdoor durability. Not all calendered films are the same. Be sure to read the manufacturer’s technical data sheet prior to material selection.
- In what type of environment will the graphics be applied? Heat and intensity of UV light varies greatly from one part of the country to another. It’s not just UV light that degrades vinyl graphics. High heat also accelerates the aging process.
- What is your customer’s budget? If the budget will allow it, convince your customer of the merits of using a cast vinyl film for long-term durability.
Interior or exterior application?
When I was at a Global Shop Show for the Point-Of-Purchase market, I discussed window graphics with a number of store designers. The most frequently asked question was “should window graphics be applied to the inside or the outside of the store windows?”
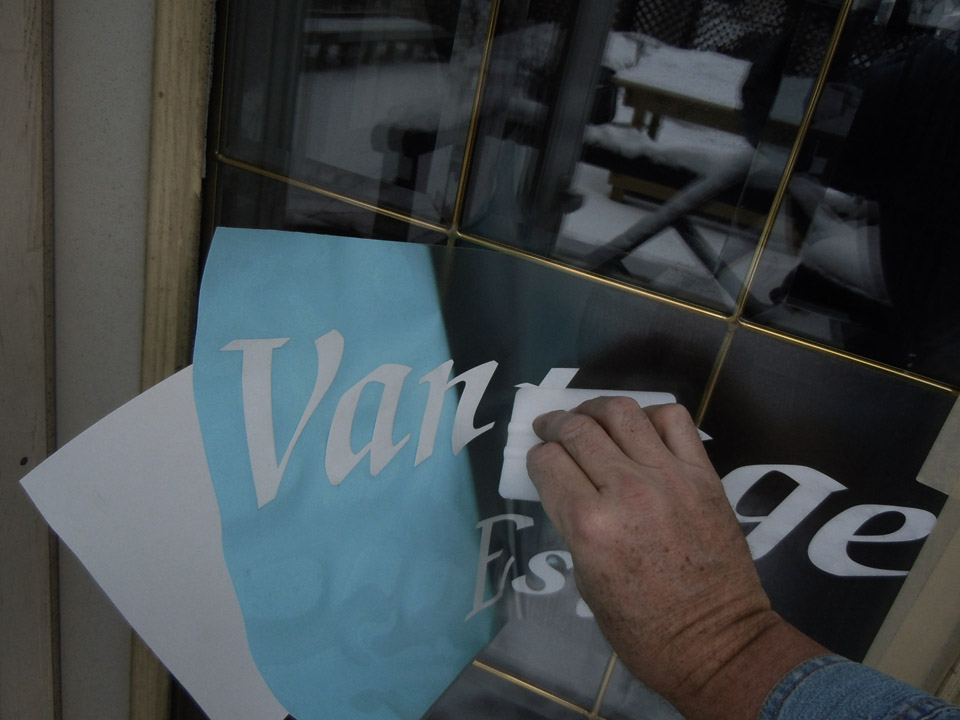
In most every case, window graphics should be applied to the outside of the windows. Here are three good reasons:
- Applied on the inside of the window, the reflective glare on the glass will kill the visual impact of the graphics.
- Many windows today are tinted, which alters the colors of the graphic.
- Application of vinyl graphics to the inside of the window often requires moving displays and shelving, as well as disrupting store traffic. Moving merchandise and store fixtures around slows down the installation and adds to the cost of the application. Exterior applications, on the other hand, pose no inconvenience to business operation, and installers may apply them after hours.
Window Graphics Application:
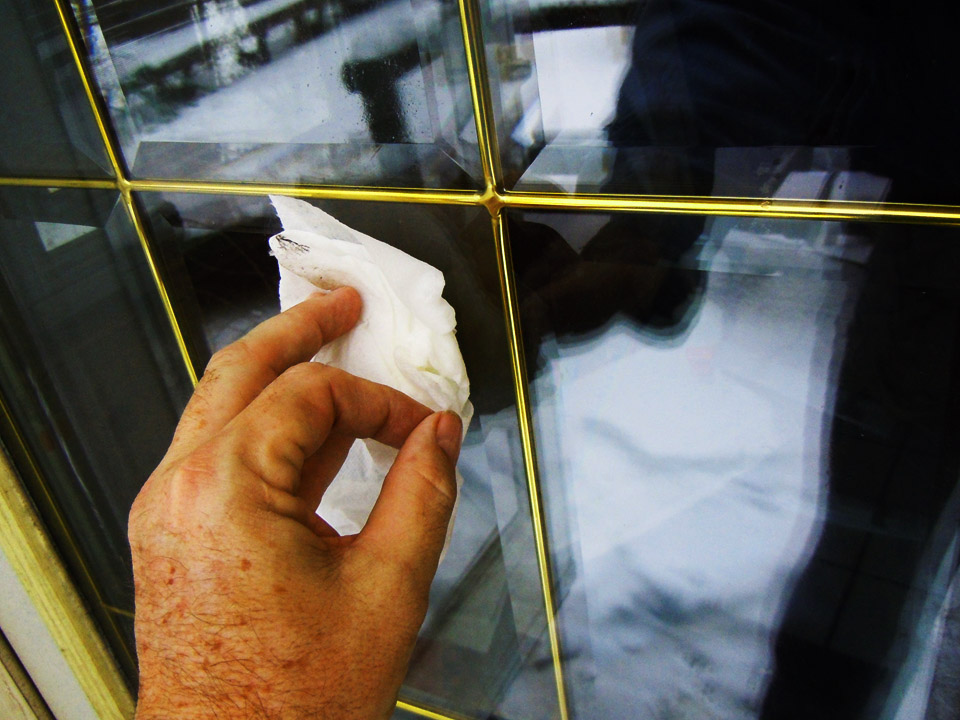
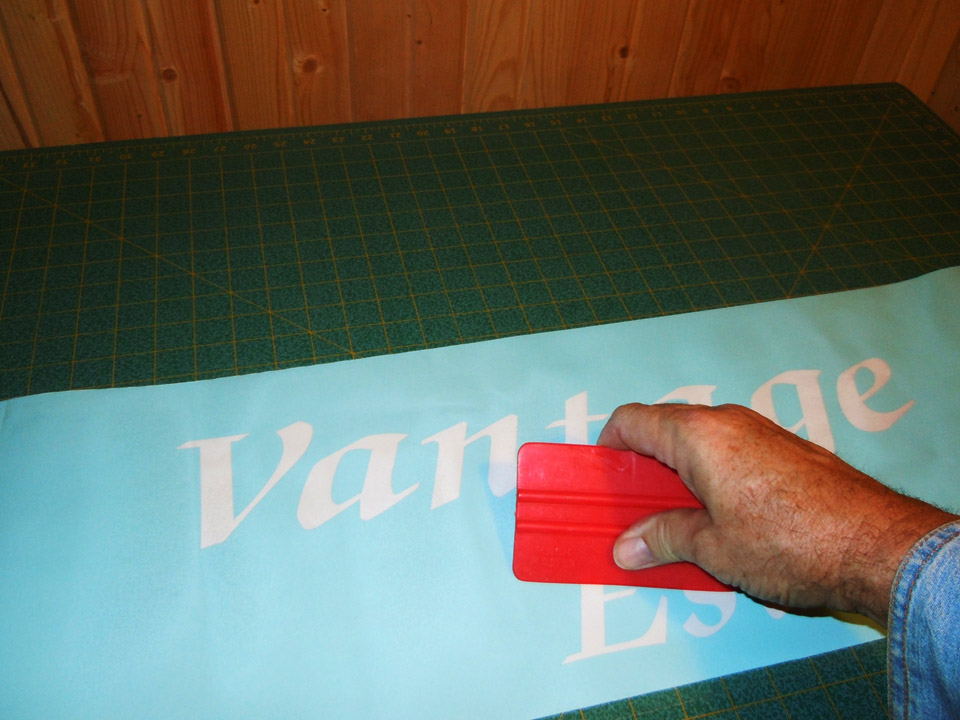
Cleaning. Prepping the surface prior to application of window graphics is a multiple part procedure. The first step is to wash the windows with a liquid detergent and water. Next re-clean the glass with isopropyl alcohol. Don’t use such glass cleaners as Windex® that contain silicones and ammonia, which can leave a residue that could inhibit adhesion. After washing carefully, inspect the windows. To clean windows speckled with dried paint, use a razor blade and re-wipe the windows with alcohol.
Application Temperatures.
Each brand and product series of vinyl is different. One big difference is application temperature range. That’s the temperature at which you can safely apply a pressure sensitive film. Before the application, make sure that you read the vinyl manufacturer’s technical data sheet. Most vinyl films, but not all, can be installed at temperatures as low as 40ºF.
When applying films in cold weather, some installers mist the windows with alcohol to lower the application temperature range. Sometimes this works.
High humidity, is less of a problem, but can still slow an application down. When applying film to glass in humid conditions, and temperatures are below the dew point, moisture can condense on the surface of the glass, which could hinder adhesion. This is less of a problem than applying vinyl graphics wet. Still, high humidity can be troublesome. If your graphics have an application tape, though, you may need to wait before the adhesive takes hold and you can safely remove the masking without removing any of the applied graphics from the window. If you can, be patient and wait for warmer temperatures.
Wash Up. Before performing a window application, wash your hands with soap and water thoroughly. If you don’t have water handy, you can also clean up by washing with alcohol. This may not be healthy, but it works in a pinch. Dirty hands transfer the dirt to the film’s adhesive side, which your customers will undoubtedly notice and object to.
Wet or dry application?
Vinyl manufacturers recommend against wet applications. The reason is that the application fluid, to a certain extent, contaminates the adhesive. In cold climates, any remaining moisture could freeze and cause adhesion problems.
Dry application is the most effective way to install window graphics. For trouble-free applications, select the right film. Some films feature low-tack, repositionable adhesives that permit an installer to apply vinyl graphics to windows without application fluid.
On a dry, window application, squeegee marks may appear on the film’s adhesive side after the graphic is installed. Forewarn your customer that the marks will be noticeable, before he has a chance to complain. Assure your customer this is only temporary. The adhesive will flow out in four or five days, and the squeegee marks will disappear.
Regardless of my advice, many sign makers will continue to perform window graphics applications wet. If you must perform a wet application, I have some do’s and don’ts for you:
- Use a commercial grade application fluid, such as RapidTac or Splash.
- Use the least amount to accomplish the task.
- Use good squeegee pressure and overlap your strokes to force all of the application fluid out from under the graphic.
- Never use glass cleaner as an application fluid. Some glass cleaners contain silicone, ammonia and other additives that can impair adhesion (Windex isn’t even recommended for preparing the application surface).
- Never apply perforated window graphics films wet – especially if the graphic has an overlaminate.
What to do about bubbles?
Don’t worry about little bubbles underneath the vinyl. With time and several days of warm weather, these bubbles will breathe out of the film. Don’t puncture the little bubbles with a pin or knife. A worse problem is puncturing the film and creating a very noticeable hole through which light can shine.
To prevent bubbles, use professional-grade application tools, vinyl films with repositionable adhesives and proper installation techniques. Here a few helpful tips:
- Always sharpen the squeegee’s edge before beginning the application, making sure the edge is free of nicks. Small nicks generate small bubbles.
- When masking, be careful. Wrinkles and bubbles in the application tape create wrinkles and bubbles in the applied graphic. If you have a laminator, use it to apply your application tape.
- When squeegeeing, use firm pressure and overlap your strokes. When removing application tape, put it 180° against itself, taking care not to pull the vinyl from the window surface.
Overlap or butt joint?
Usually, when you apply graphics in multiple panels, overlap the vinyl at least 1⁄4 in., where the panels form a seam. But don’t do this to perforated, window-graphic films, which are comprised of thousands of little holes that represent 40 to 50% of the total area.
Because the film has so many little holes, there’s approximately half as much adhesive on the top, overlapping sheet of vinyl film. The bottom graphics panel has roughly half as much surface area to stick to. This is a sure recipe for a vinyl failure, in which edges are guaranteed to lift. Instead, butt the panels together.
Edge-lifting problems can also occur where the vinyl touches the edge of the window. Always trim 1⁄4 in. of the film away from the edge. To minimize edge lifting, you can always edge seal the graphic, with a commercial edge sealer or a clear coat, such as Frog Juice. If graphics start to peel at the edges, trim the peeled material and then edge seal the graphic.
Overlaminates.
Some vinyl companies recommend or require an overlaminate with their perforated window-graphics film. This precludes using application fluid, because fluid would be trapped inside each little hole.
In the real world, very few people will use an overlaminate. Failure to use an overlaminate on perforated window graphics films, however, can result in problems. Without an overlaminate, edges can lift and dirt can collect in the holes.
Removal of Window Graphics.
A few weeks ago, I was watching two installers remove graphics from the glass doors of my bank. Winter had not yet left Northwest Indiana, and the air was freezing. To warm up the vinyl, the installers used a propane torch with a spreader tip. I am sure that they were aware of the possibility that too much heat would crack the glass, because they were careful not to get too close with the heat.
Some vinyl manufacturers recommend using a heat gun or propane torch to remove film. If you opt to do so, use extreme caution because overheating can easily crack glass, especially in cold weather.
If your are not willing to take chances, you have a couple of other options. You could always use a razor scraper and plenty of elbow grease. Or you could try using a chemical film and adhesive remover. A strong solvent, such as xylene, removes edge sealant. When using chemicals, mask off the window’s edges to prevent any damage to window gaskets.
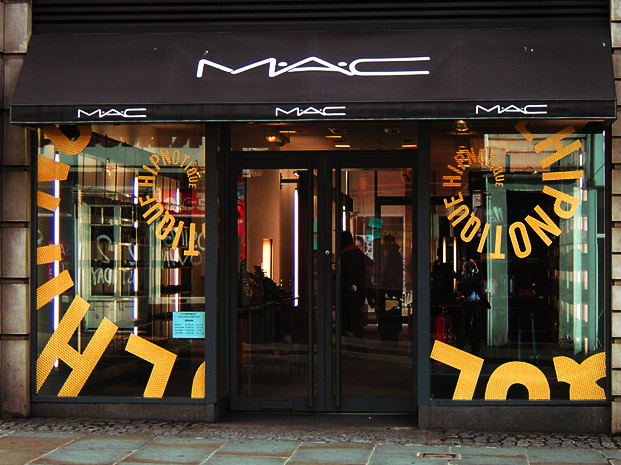
Many communities in the US and Canada have restricted the amount of coverage on windows. New Look Fashion stores in the UK, used VinylEfx® to attract attention to their window displays. According to the Point-Of-Purchase Industry Association (POPIA) window displays are viewed for an average of 11 seconds and account for 25% of store traffic.
Getting the passer by to open a store’s doors is only half of the battle. Once in the store, the shopper forms an impression about the business within the first fourteen seconds. These are impressions that you can influence with a modern environmental graphics program, that includes window graphics.
The cleanliness of the store, the décor and the professionalism of the in-store signage and displays influence the opinions of the consumer that ultimately determine whether he or she buys or doesn’t buy. In fact, remodeling the appearance with colorful window and wall graphics and in-store signage is a much better investment for a retailer than traditional advertising in newspapers, trade magazine, radio and TV, because the return is higher sales and profits.
RECOMMENDED VINYL GRAPHICS APPLICATION TOOLS
SEALITPEN
● Felt tipped marker filled with acrylic clear coat.
● Use the SEALITPEN to edge seal a vinyl graphic.
● A clean way to apply edge sealer – no brush required.
3M Brand 3950 Edge Sealer
● Seals exposed edges of vinyl graphics.
● Prevents pressure-sensitive vinyl films from lifting resulting from environmental exposure or cleaning.
● Easy to apply clear edge sealer with a small artist’s paint brush or sign maker’s quill.
● Essential sealer for any professional graphics installer.
● Suitable for graphics applications in temperatures from 50°F to 100°F.
3M Tape Primer 94 1/2 Pint 8oz For Vinyl
● Promotes adhesion of all brands of pressure sensitive vinyl films and 3M™ VHB™ Tape.
● Use when vinyl graphics will be stretched into concave areas.
● Use complex vehicle contours, such as bumpers.
● For use on difficult to stick to and low energy surfaces such polyethylene, polypropylene, ABS, PET/PBT blends, concrete, wood, glass, metal and painted metal surfaces.
● Dries to a clear finish.
● Cleans up with isopropyl alcohol.
Steinel HG 2510 ESD Programmable IntelliTemp Heat Gun with a LDC Display
● Temperature range: 120°F – 1200°F.
● LCD display enables temperature selection in 10°F increments
● Ideal for applications requiring precision control.
RollePro Vinyl Application Roller
● Using a RollePro eliminates the need to puncturing holes in vinyl films. No need to use a rivet brush.
● Reduces the speed of applying vinyl graphics over rivets up to 50%.
● Install vinyl graphics faster to make more money.
RollePro™ Textured Surface Kit
The RollePro™ Textured Surface Kit includes a standard handle, an original wheel and a high temperature wheel. The high temperature wheel can be used on a variety of surfaces such as brick and concrete.
3M Air Release Tool
Needle point punctures bubbles under vinyl graphics to remove entrapped air. Retractable point protects graphics installer from puncturing himself.
Car Wrap Magnets
• Vinyl wrap magnets hold vinyl graphic in place for easier application.
• Replaces masking tape in positioning graphics.


