At a vehicle wrap workshop I spoke with a “old school” decal installer who scoffed at new tools that were being demonstrated. “Why do you need to buy another gimmick for vinyl application?” According to him, all you need to apply vinyl graphics is a squeegee, rivet brush, knife, tape measure, propane torch and air release tool.
I don’t disagree that all of the new tools are necessary. In the hands of trained professional applicator, the traditional tools are sufficient for most jobs. My point is: why do you want to struggle with the basic tools, when a specialized tool will help you do your job better, faster, easier and ultimately save you money? I guess I’m just a gimmicky kind of guy.
In this article I will review the necessary tools that should be in every installer’s tool box. I will also describe many fantastic new gimmicks that, in my opinion, deserve a place in your bag of tricks.
Use the vinyl application tools that work best for you.
Compared to the tools used by other trades, such as carpentry or auto mechanics, vinyl application tools are very affordable. Each year, I page through my favorite sign supply distributor catalogs and buy whatever tool is new on the market. I will admit that most of the tools that I try end up on the bottom of a tool box, never to be used again.
Some may view this as a complete waste of money. I think of it as research necessary for anyone in the business. Putting a product to the test is the only way that I can understand the advantages of one tool versus another is to put it to the test. As one boss told me, if the tool works, continue to use it. If it doesn’t, set it aside and try something else.
RollePro Vinyl Application Roller.
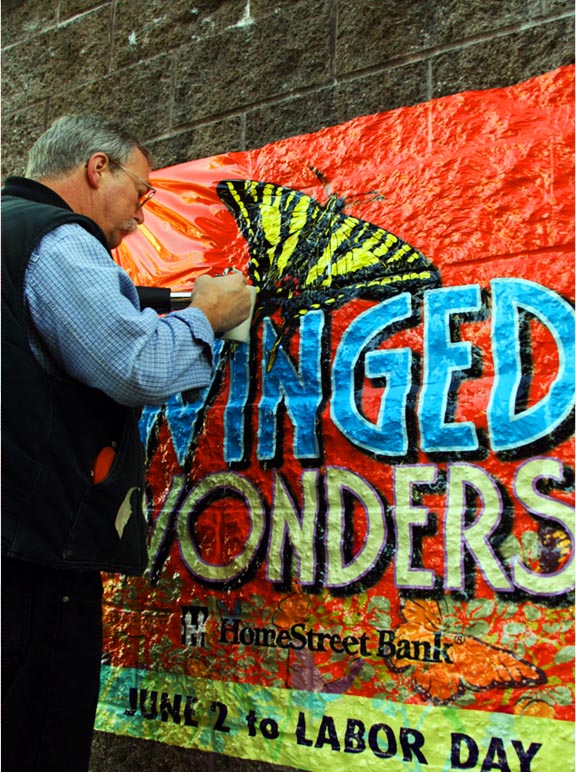
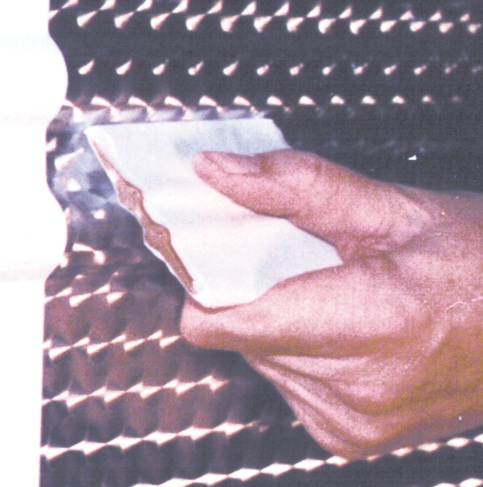
For professional decal applicator, Dustin Owens, applying vinyl graphics to rows and rows of rivet, day after day was pure drudgery. What’s worse, it was time-consuming and it was the primary cause of the tendonitis that he still suffers from. Owens did more than hope for an easier way. He invented one. It’s called the RollePro, a soft, heat-resistant foam roller applicator that uses 3M licensed technology and makes application to rivets fast, easy and painless.

“In fewer than three minutes, I can apply vinyl to the bottom row of rivets on a 53-foot trailer,” claims Owens. Ever the skeptic, I asked Dustin to show me. With propane torch in one hand and the RollePro in the other, Owens simultaneously heated the rivets and rolled over them with his new tool. “You can lay down rivets just as fast as you can walk,” says Owens.
You probably think that this sounds too easy. It’s actually easier than you think. Here’s one reason. What’s missing in this application procedure is the puncturing of the vinyl. That’s right. You don’t need to prick the vinyl. You also don’t need to use a rivet brush. “After developing the RollePro, the only thing that I use a rivet brush for is to clean the glue off of the rivets in a removal job.”

Other than buying a RollePro, the only other thing that you need to do is to slightly change your application technique. Instead of squeegeeing over the rivets, Owens instructs installers to squeegee just up to the rivet row. If you have a double row of rivets to do, squeegee the film on either side of the two rows. Then, with your squeegee at an angle, apply the film between the rows. After that, use the RollePro to lay down the film over the rivet rows.
Rivets aren’t the only application for this new tool. “I’m always finding new ways to use the RollePro,” Owens says. “It’s also great for applying film on textured wall surfaces, over diamond deck plates, louvered vents, side moldings and emblems on cars, and over door handles.”
The Next Generation of Vinyl Application Tools.
Before retiring from 3M, Product Development Sr. Specialist, Ron Steelman was given the assignment to rethink and redesign the tools that decal applicators used. The fruits of his years of labor resulted in a new generation of tools for the latest generation of vinyl films and new applications, including vehicle wraps and wall graphics. This generation of graphic application tools includes the ergonomically designed Power Grip applicators, specialty tools for wraps and a series of foam roller to apply graphics to textured walls.
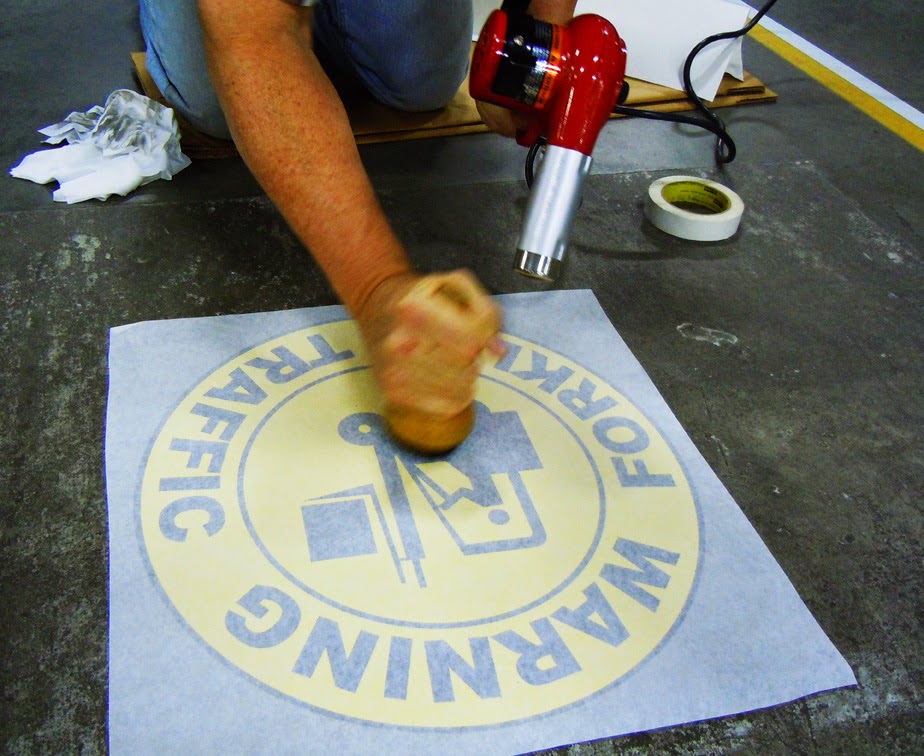
3M™ Textured Surface Applicator TSA-1.
Do you think that installing vinyl on stucco would be a rough application? Without the right tool, it would be and for many it would be impossible. 3M developed a heat-resistant foam roller which, when used properly, will allow the installer to quickly apply large areas of some cast vinyl graphics to textured surfaces.

The roller applicator and the technique for using it is very similar to that of the RollePro. The roller of the 3M application is larger and the foam material is slightly softer, so the tool can conform easily to rough textures. Although many experienced professional decal installers prefer working with a propane torch, 3M recommends the use of their foam rollers with the type of heat gun that lets you dial in the heat setting. That way you can be sure that the temperature is hot enough to break the memory of the film.
Applications to textured walls requires that you set your heat gun at 1000ºF. At these high temperatures don’t worry about burning the film. The temperature of the vinyl only reaches 200 ºF to 250 ºF. “That’s not high enough to damage the film, but it is high enough to melt the vinyl,” said 3M’s Ron Steelman. “In a sense, you’re just thermoforming the film to the texture of the wall.”
Steelman said that in years past, installers tried to apply vinyl films to textured walls using rivet brushes. Usually these applications were unsuccessful. Although the installer may have heated the film to the recommended temperature, by the time he burnished the vinyl with the brush, the film was cool again and would stretch back to its original shape
3M™ Textured Surface Applicator TSA-2.
To apply vinyl films into mortar joints and around corners, 3M developed a soft foam bevel-edged roller applicator. The soft roller conforms better to textured wall surfaces and withstands high application temperatures. The recommended heat setting for wall applications is 1000 ºF.
3M™ Textured Surface Applicator TSA-3.
A smaller version of the TSA-1, the TSA-3 is small area foam roller for textured surfaces.
3M Vehicle Channel Applicator Tool VCAT-2.
Have you had problems applying vinyl into sidewall vehicle channels using traditional tools? Speed up your vehicle wrap installations with the VCAT-2 applicator. It’s a bevel-edged foam roller that looks identical the 3M TSA-2 roller. The difference between the two tools is the density of the foam. For vehicle applications, decal applicators needed a firmer foam to form film into deep channels. The recommended heat setting for this application is 350ºF to 400ºF.
3M TSA-4 Rock ‘N Roller.
For higher speed wall applications, 3M introduced the TSA-4. Some affectionately refer to this device as the “Rock ‘N Roller”. (I like that name. It has more sales appeal that TSA-4.) This two-handled roller allows you to put maximum pressure on the graphic as you are applying the film.
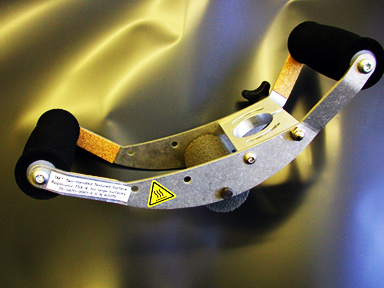
So how do you hold the heat gun while your two hands are on the roller? It’s a trick question! You don’t need to. The TSA-4 has a slot in which you clamp your heat gun. Secured in place, the heat gun is always at the right distance from the surface of the graphic and from the roller. This allows the installer to concentrate on the job at hand.
At an SGIA show in Las Vegas, one union rigger was trained to use the tool in fifteen minutes. It only took the novice installer one day to install numerous murals on the block walls of the convention center.
With the right materials, proper planning, training and an investment in the right tools, you can be rock’n and roll’n in the wall graphics market, too.
3M Power Grip Magic Pad Rivet Applicator CMP-1.
To apply vinyl films with embossed adhesives, such as 3M Comply™ series films, the 3M Company has developed their Magic Pad™ rivet applicator. “Most people who try the Magic Pad and don’t like it, aren’t using it correctly,” says RollePro inventor Dustin Owens. “Just like most things in life, there’s a right way and a wrong way to do things.”

According to Owens the wrong way to use the rivet applicator is to twist the tool as you are molding the film to the rivet head. “You can’t use the Magic Pad the same way that you use a rivet brush,” Owens says. “If you do, the pad will twist right off.”
When using the Magic Pad, Owens recommends the follow procedure. First, he punctures the vinyl with a single pin prick at the top of the rivet. The he presses down on the rivet with the Magic Pad, while the vinyl is still cold. Then he applies heat. Owens prefers using a propane torch over a heat gun, because the heat is more intense, which allows him to work much faster. After heating the rivet head, Owens then presses the pad over the rivet for a few seconds.
Rivet brushes.
Rivet brushes have a variety of applications other than merely burnishing vinyl around rivet heads. It’s also a handy tool for applying vinyl onto corrugations and onto banners with a heavy scrim. Old rivet brushes are also great for scrubbing adhesive from rivet heads, while performing graphics removal work.

This stiff-bristled, nylon brush burnishes vinyl films onto the heads of truck rivets. The most common rivet brush has a 1-in.-diameter head, although 3-in. brushes are also available (great for banner work). 1-in. rivet brushes cost about $6 each, while the 3-in. brushes, which have shorter, stiffer bristles, cost $15 to $20.
In applying graphics to banner material, after you remove the application tape from the vinyl graphics, and re-squeegee the entire graphic, finish the application by using a rivet brush and heat gun to burnish the vinyl into the banner’s textured surface. The heat and brushing technique will aid the adhesive flow and result in improved, ultimate adhesion.
I prefer working with a stiffer brush, because it requires less elbow grease in the burnishing process. To stiffen the bristles, I trim the bristles to a shorter length. Some installers carry several brushes with bristles of varying lengths. The shorter, harder-bristle brushes are used for warm-weather applications, when vinyl is softer, more pliable and less likely to crack under pressure. As temperatures become colder, vinyl becomes harder, more brittle and apt to shatter. Under these circumstances, brushes with longer bristles should be used.
A utility knife is one way to cut bristles to a desired length. Hold your knife steady against the bristles and rotate the brush with your other hand. When doing this, be sure to wear safety glasses to protect your eyes from flying bristles.
After cutting the bristles, they will have very sharp points, sharp enough to damage vinyl graphics. By quickly passing the flame of a propane torch over the tips of the brush, the heat will melt and the round the bristle’s sharp points.
3M Power Grip Rivet Brush Applicator.
Repetitive motions used in burnishing vinyl with a rivet brush put unusual strain on muscles, nerves and tendons. This can lead to problems, such as tendonitis, which can be very painful and irritating. Rivet brushes with thicker handles are more comfortable to grip and put less stress on the tendons around your elbow. I also like the thick-handled brush because its stiffer bristles provide the most pressure. The one-inch rivet brushes with the larger handle only cost about a dollar more than a standard rivet brush.
3M Tape Primer 94.
When you have to stretch a film into a channel on the side of a vehicle or push it into an indentation, you’ve often pushed the film to its limits. Just consider what happens when you stretch a two mil vinyl 200%. That two mil vinyl is now just one mil thick. One mil of adhesive is now only a half of a mil. Is it any wonder that films frequently fail in these applications?
To improve your odds for a successful application, try coating these concave areas first with a thin layer of Primer 94. The operative word is “thin.” “I’m sure that you’ve heard that ‘less is more’, says wrap guru Sergio DeSoto. “That expression applies to the 3M Primer. Laying it thick won’t help you a bit. The mass of the coating is not what improves the bond to the substrate. It’s the chemistry that does the work. In about ten minutes, the primer will tack up. After that you’re good to go.”
The 3M primer works with 3M wrap vinyl. It’s also great to use when installing window graphics on vans or buses. Just apply a thin line of primer around the perimeter of the window to ensure good adhesion and prevent edge lift. “Use a quarter-inch flat brush to paint a very thin coating,” recommends 3M Marketing Manager Tim Boxeth. “For any clean up or to wash out your brush, we make a citrus-based aerosol cleaner, which you can also use for removing adhesive residue.”
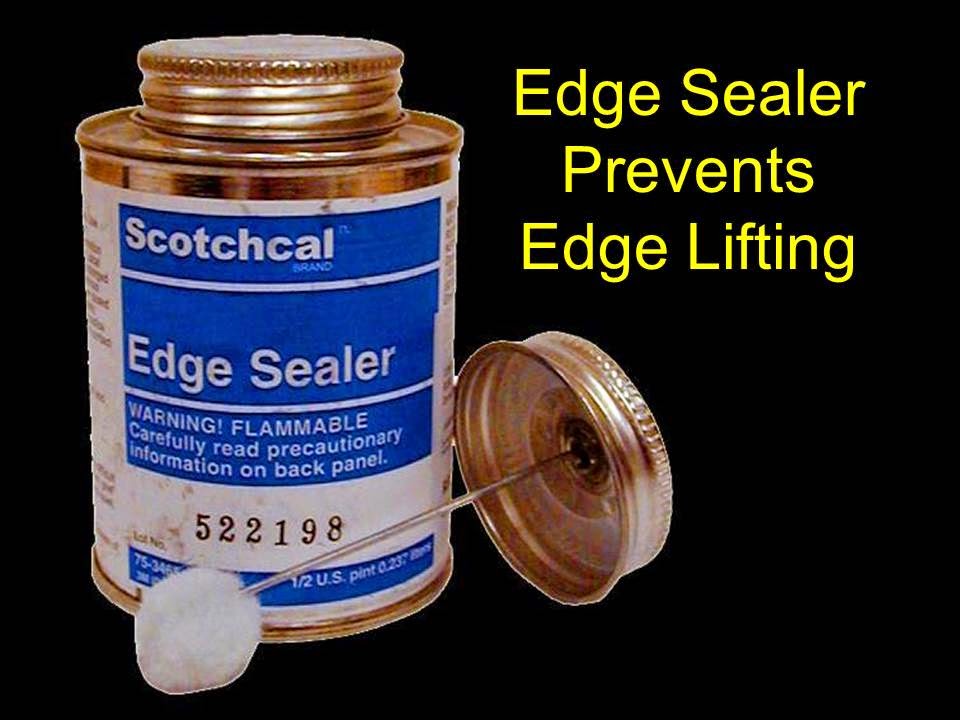
3M™ Edge Sealing Tape 8914.
Any time that you stretch a vinyl film around a curve, the memory of the film will cause it to shrink back. “Heat breaks some of the film’s memory,” says Fellers’ Director of Marketing Sergio DeSoto. “Even after heating, the film still wants to return to its original shape. When that happens, the edges can sometimes lift.” To hold the edges of applied vinyl graphics securely in place, 3M developed their Edge Sealing Tape.
Using edge sealing tape can also prevent other edge lift problems. “The edges of perforated window films are vulnerable because dirt can collect in the perforations at the edges,” DeSoto says “To secure the edges, you need to either edge seal. Using the edge sealing tape is usually faster and cleaner than painting on a drippy edge sealing liquid.”
Industrial Heat Guns.
A heat gun comes in handy when performing a vehicle wrap or installing graphics to a texture. It has enough heat for any application and for the novice installer is much safer to use than a propane torch, because the heat is less intense. In this type of application, you are less likely to damage an expensive printed graphic with a heat gun.
“For anyone just getting started in vinyl applications, don’t even think about using a hair dryer,” says 3M’s Tim Boxeth. “Applications to compound curves and textured surfaces require heat. If you don’t heat a cast vinyl to the right temperature, you won’t break the memory of the film.”
For applications to brick, stucco and tile, Boxeth recommends heating the film to between 1000°F and 1100°F. So how do you know if you’re applying sufficient heat? “With a Steinel heat gun you can just dial in the temperature that you need,” Boxeth says. He also recommends using an IR Temperature gun for measuring the substrate or the film temperature.
Propane Torch.
Most professional decal installers prefer a torch to a heat gun, because the heat is much more intense, which makes the installation go faster. Another reason that torches are the professionals’ tool of choice is that you don’t need extension cords or an electrical outlet.
Working with a torch requires a little practice, so you don’t burn the vinyl. Care should also be taken so you don’t ignite nearby flammable or explosive material. Tim Zavala, President of Gator Wraps in Las Vegas, Nevada, says “If you are new to using a torch, always have the graphic premasked to protect the vinyl from scorching.”

When applying cast vinyl over rivets, corrugations or textured surfaces, film must be heated to 500-700° F. When installing vinyl over rivets, wave the head of the heat gun or torch over the head of the rivet, and then burnish the film with a rivet brush. In this process, the heat will break the memory of the film and allow it to conform to rivets and corrugations.
Zavala says that using heat to make vinyl graphics conform to the curved surfaces of a vehicle is a two-step process. “Heat allows you to stretch the film. Then, after it’s applied, you need to reheat the material to secure it.”
Self-igniting propane torches, which are convenient to use, are often sold in kits for approximately $35.
Weed burners.
Using heat is essentials for most vinyl removals. Heating the old graphics softens the film and the adhesive, which allows for easier vinyl removal. Although a propane torch or heat gun provides enough heat to remove smaller letters and graphics, they do not produce sufficient heat for larger graphics.
For the big removal jobs, you need a huge propane torch, known as a weed burner. This torch has a long handle, tipped with a large nozzle, that can produce a 2-ft. flame and more than 150,000 BTUs. When you open up the value controlling the flame, the torch will roar like a jet engine.
If you buy a weed burner, get one with a long hose. With an extra long hose, the propane tank can be left on the ground, safely leaving the scaffolding free of another object that you can trip over.
When removing graphics, you want to heat a large section of the truck surface for approximately one minute. This should keep the surface warm, so you can remove a large section of graphics. Weed burners typically cost about $75.
In this heating process, keep the flame moving so you don’t burn the graphics or the substrate. When using a weed burner, use extreme caution and a lot of common sense. The surface of the substrate will be hot – hot enough to blister fingers unaccustomed to removal work. To spare your fingertips, use a Lil’ Chisler to safely scrape off old graphics without damaging the substrate.
Squeegees.
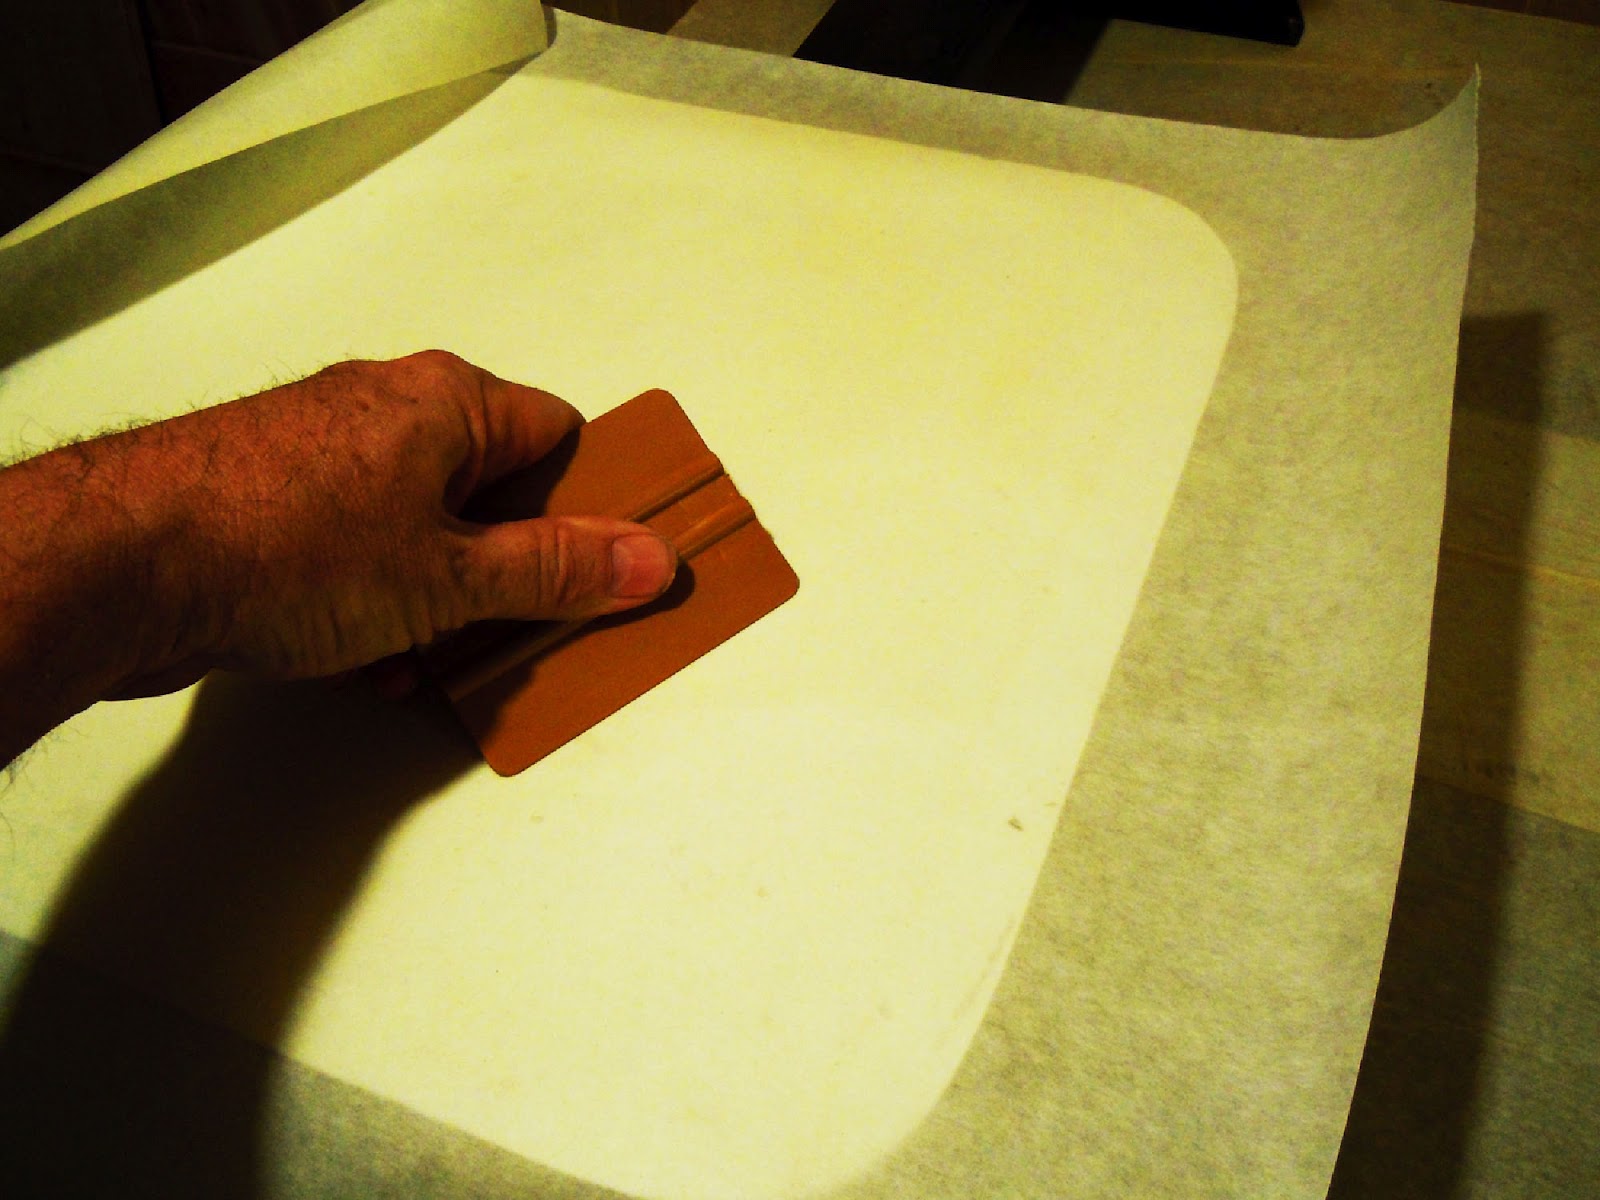
Although a squeegee is little more than a thin, piece of plastic, it is an installer’s most important tool. Squeegees are made from a variety of materials and in a number of shapes and sizes. The 4” squeegees are most popular, but they also available in 6” and 12” sizes.
The people at Lidco Products (St. Paul, MN), who have been the leading innovator in squeegee design, have been good enough to send me boxes of their stock and prototype squeegees to test and evaluate.
Although I keep many of their squeegees in my bag of tricks, I generally use just four types: a gold-colored nylon-reinforced squeegee for general vinyl application to smooth and riveted surfaces; a softer, more flexible plastic squeegee for applications to corrugations; and a Teflon® squeegee and a thick felt squeegee for vehicle wraps.
Soft, plastic squeegees.
Although a nylon-reinforced squeegee is generally my weapon of choice, a softer, plastic squeegee usually works better, in my opinion, when applying vinyl graphics to corrugated or contoured surfaces. Because these squeegees are more flexible, they conform better to the curves of the corrugation. These cheaper, softer flexible squeegees will wear out and loose their shape more quickly.
Sharpening your squeegee.
Before starting any vinyl application, you should get into the habit of inspecting your squeegee’s edges, which should be smooth and straight. Using squeegees with nicked, bowed or uneven edges often causes bubbles. Most squeegees with nicks or burrs can be sharpened by vigorously rubbing the squeegee’s edge against one of the two beads or ribs in the center of another squeegee. As you sharpen the squeegee, you will produce a very fine plastic dust. To prevent developing a squared off corner on your squeegee, you should also sharpen the rounded corners of the squeegee, by rolling them against a squeegee rib.
Get a grip with a squeegee handle.
Squeegeeing for hours at a time puts pressure on your wrist, which could develop into carpal tunnel syndrome. To give you a better grip on your squeegee and reduce wrist strain, Lidco Products developed the EZ Grip Squeegee Handle that slips onto a standard squeegee. The ergonomical design of the squeegee handle allows you to apply more pressure on the graphic as you are squeegeeing. Squeegee handles come in standard sizes of 4”, 6” and 12”. The cost of a standard four-inch squeegee handle is about $4 each.
Roller applicators.
Although I prefer using the traditional squeegee for vinyl application, I own at least a half dozen different types of roller applicators, also referred to as brayers. Roller applicators come in a variety of designs and a few different roller widths. Prices for roller applicators generally range from $8 to $30.

When shopping for a roller applicator, look for a heavy-duty one that will allow you to apply firm, downward pressure. I prefer the Sabel block roller because it’s easy to handle, and I think it delivers the most pressure.
Nylon-reinforced squeegees.
Although squeegees look alike, their hardness can differ. Soft squeegees nick and wear out easily, and often generate tiny bubbles in the vinyl. For this reason, most professional decal applicators prefer the hard, gold-colored nylon-reinforced squeegees. They cost more ($2.25 to $3.25 each), but they outlast the flimsy ordinary squeegees. If you sharpen these squeegees before each use, (which I will describe shortly), the golden squeegees will provide months of use.
The stiffer, nylon squeegees allow you to apply the right amount of pressure, to force air from under the film and aid the adhesive’s flow out. Remember, vinyl films are pressure-sensitive materials. You need to apply the right amount pressure for the film to stick.
Teflon squeegee.
In doing a vehicle wrap, at some point in the installation you will be applying the film without an application tape. Hard nylon squeegees tend to scratch the graphics. To prevent scratches, some installers use felt squeegee or wrap their squeegee with a soft cotton rag.

Another alternative is to use a Teflon® squeegee. The slick surface of these flouroplastic Teflon® squeegees glides smoothly over the film without scratching it. And these rigid squeegees are stiff enough to push out stubborn wrinkles and edge puckers, that invariably develop as you work the film around compound curves.
To see the difference between the new Teflon® squeegee and an old-fashioned nylon squeegee, pull both of them across the surface of a vinyl graphic. The Teflon® squeegee will slip over the film’s surface effortlessly. By comparison, you will feel the considerable drag pulling the nylon one. The standard 3” x 4” Teflon® squeegee costs about $1.50 each.
Felt squeegees.
Twenty years ago, while traveling in Europe, I noticed that the installers there preferred felt squeegees. At the time, these squeegees were unheard of in the States. Today, many sign supply distributors sell a variety of felt squeegees, available in different densities, shapes (rectangular and semicircular shapes) and thicknesses.

A dense felt squeegee is the perfect tool for vehicle wraps, because it is flexible enough to work a vinyl graphic into tight corners and around compound curves; it generates sufficient pressure when stretching a film into an indentation or crease on the side of a vehicle; yet it is soft enough to prevent scratching of the vinyl. Felt squeegees are available in various densities, and in rectangular and semicircular shapes.
Felt squeegees should only be used for dry applications. Once felt gets wet, it starts to disintegrate. Priced at about $8, the denser and harder felt squeegees are usually preferred for vinyl applications. My advice is to try numerous squeegees, and use what works for you.
Low-friction sleeve.
After removing the application tape, always resqueegee the entire graphic, especially the edges and overlaps to prevent edge lifting. Without the protection of application tape, hard squeegees can easily scratch bare vinyl.
To prevent your vinyl graphics from damage, slip a low friction sleeve, over your squeegee. Made of DuPont’s Tyvek®, which is a polyethylene, paper-like fabric, low friction sleeves cost about $.60 each.
One of the new additions to my tools box is a felt squeegee sleeve, which is made of an industrial grade white felt. The soft felt squeegee sleeve, which prevents the edge of a hard squeegee from scratching or gouging the vinyl. is ideal for applying digital prints without an application premask. More expensive than a low-friction sleeve, felt squeegee sleeves cost about $1.60 each.
As an alternative to squeegee sleeves, you can also use a squeegee wrapped with a soft, felt edge. Squeegees wrapped with a felt edge cost about $1.80 each. You may want to opt to make your own, wrapping a squeegee with the soft, felt side of a Velcro® strip. Rolls of Velcro® are readily available at office supply stores.
3M 5151 PFTE Glass Cloth Tape.
Wrap this remarkable tape to the edge of your squeegee, and your squeegee slide across a vinyl graphic like a skater on ice. So what makes this glass cloth squeegee tape work the way it does? It’s impregnated PTFE or polytetrafluoroethylene. To the layman, PFTE is better known by the DuPont brand name “Teflon”, the slick stuff that makes frying pans non-stick. The thick PTFE coating on the tape gives squeegees a non-stick surface. Even when working aggressively, this low friction surface protects graphics from scratches.
Air Release Tools.
An air release tool is fancy term for a needle attached to handle. You can buy the bargain basement type with a wood dowel for a handle for less than a couple of bucks. My favorite air release tool has a retractable pinpoint, which prevents me from puncturing myself when I put it in my shirt pocket. The deluxe air release tool costs about $25. It’s worth every penny. If the pin get dull or bent, you can buy replacement pins.
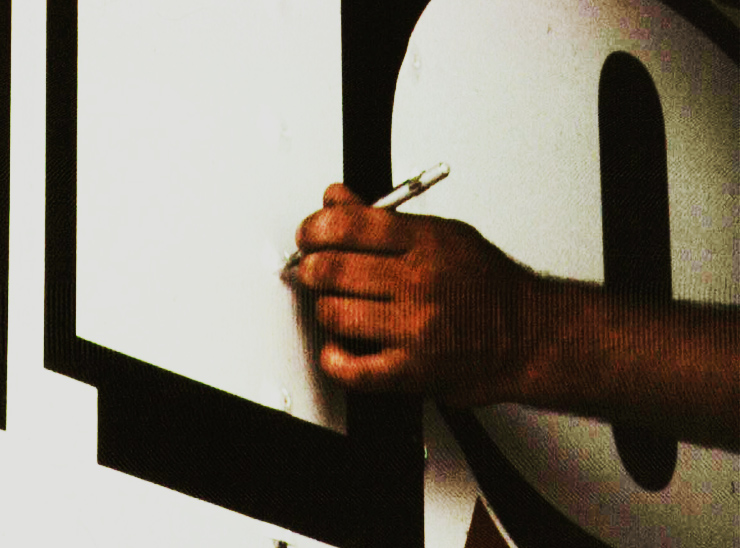
Whichever tool you decide to use, puncturing the applied graphic in several places around the rivet head, allows any trapped air under the vinyl to escape, as the film is burnished. A common mistake is to use a razor blade or X-acto® knife to puncture the film. A razor or knife blade creates a slash in the vinyl, which will open in time, as the film shrinks. On the other hand, a pin prick creates a circular hole, which will close around itself.
In applying vinyl, even the best installers occasionally trap air under vinyl graphics. Don’t worry about the small ones. They dissipate with time. The large bubbles, however, must be popped. Using your air release tool or pin, puncture the bubble at one of its edges. Push out the entrapped air with your thumb, first squeezing the bubble at the opposite end from where the puncture is. Carefully move your thumb toward the puncture.
Wartenberg pinwheel.
Vinyl that covers rivet heads must be punctured with several pin pricks prior to burnishing with a rivet brush. Many professional installers use a Wartenberg pinwheel, a chiropractor’s needle point wheel used to test nerve response.

By rolling the needle-sharp spikes on either side of the rivet row, the pinwheel creates tiny punctures that allow air to escape as the material is burnished around the rivet head. Medical-supply stores — as well as some sign-supply distributors — sell this tool for approximately $30.
Edge sealer.
Some graphic applications are prone to edge lifting. For example, frequent spillage from gasoline or chemical tankers subjects their decals to extreme abuse. If the edges are not sealed, the chemicals can seep behind the graphic, causing the adhesive to fail. Painting the edge of the graphic with a thin line of clear 3M 3950 edge sealer, clear coat or Butch Anton’s Frog Juice, prevents lifting and peeling.
All metallized films, such as reflective sheeting or R Tape’s VinylEFX™ films, should be edge sealed. Unprotected edges are prone to corrosion and edge lifting.
Commercial edge-sealers, such as 3M 3950 Edge Sealer, usually come in 1-pint cans. A 1/4-in. paintbrush gives good control in applying a smooth coating of sealer without drips and runs. You can also use a foam brush to apply the clear coat. Remember, edge-sealer should only be painted on the edge. Pint cans of a commercial edge-sealer typically cost approximately $15. Two-part edge-sealers are recommended for reflective sheeting. If a commercial edge-sealer is not available, you can substitute a screen print clear coat.
Another alternative is to seal the edges of the graphic using Art Schilling’s SEALITPEN. The SEALITPEN looks like a felt tip marker. Before using the pen, you will need to prime it by shaking it vigorously for fifteen to thirty seconds. A SEALITPEN costs about $9 each.
Edge sealer and varnish are not the same thing. Never paint vinyl graphics with varnish. Varnishes contain very hot solvents that can penetrate vinyl facestock and attack the adhesive system.
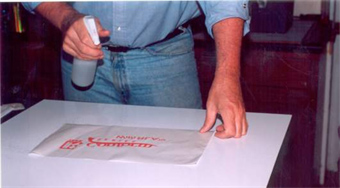
Application fluid.
The rule of thumb among professional installers is always apply graphics dry; never use application fluid. In my opinion, there are a few exceptions to the rule. Installing vinyl to a plastic signface with using a application fluid can result in a zillion tiny bubbles. Although these bubbles will breathe out from under the film and disappear after a few days of summer heat, the correct way to apply vinyl to a flat plastic surface is with a commercial application fluid. Note that I specify a “commercial” product, not some concoction that you make yourself.
Extremely hot application temperature and vinyl films with aggressive adhesive systems are a couple of other exceptions to the rule. A hot surface can cause the adhesive of graphics to preadhere to substrate. Preadhesion means that the vinyl sticks before you want it to stick, leaving you stuck with a graphics disaster.
With application fluid, you avoid preadhesion problems. These fluid aid installations, by allowing you to float the graphic onto the surface. These fluids allow you to reposition the graphic without distortion, until you register it to the right location.
Years ago, when I worked for Arlon, I told sign makers they could make their own concoction by mixing 20 oz. of water with 1/2 tsp. of a dishwashing liquid and 1/2 tsp. of isopropyl alcohol. At that time, I believed application fluid was that simple. I was wrong. In doing a side-by-side test of my mixture vs. the real stuff, I learned that commercial fluids work better because they promote faster vinyl adhesion to the substrate.
Don’t waste your time trying to duplicate these products, because you’ll never achieve the same consistency. Dishwashing liquid and similar soaps contain additives such as surfactants, emulsifiers, moisturizers and perfumes, all of which are detrimental to an adhesive. Surfactants, for example, help cleaners break dirt’s bond with the substrate. They have the same effect on adhesives, causing bonding failure and edge lifting.
I recommend using a commercial application fluid, such as Rapid Tac®, Clearstar’s Action Tac and Splash, or GAP’s Quick Stick. Manufacturers of these fluids produce a consistent product.
At $23 and $27 a gallon, application fluids can seem a little pricey. The high cost of these fluids prompts some sign makers to “extend” their supply of the mixture by adding water. Remember, if you dilute your application fluid, you’ll dilute the adhesion-promoting characteristics.
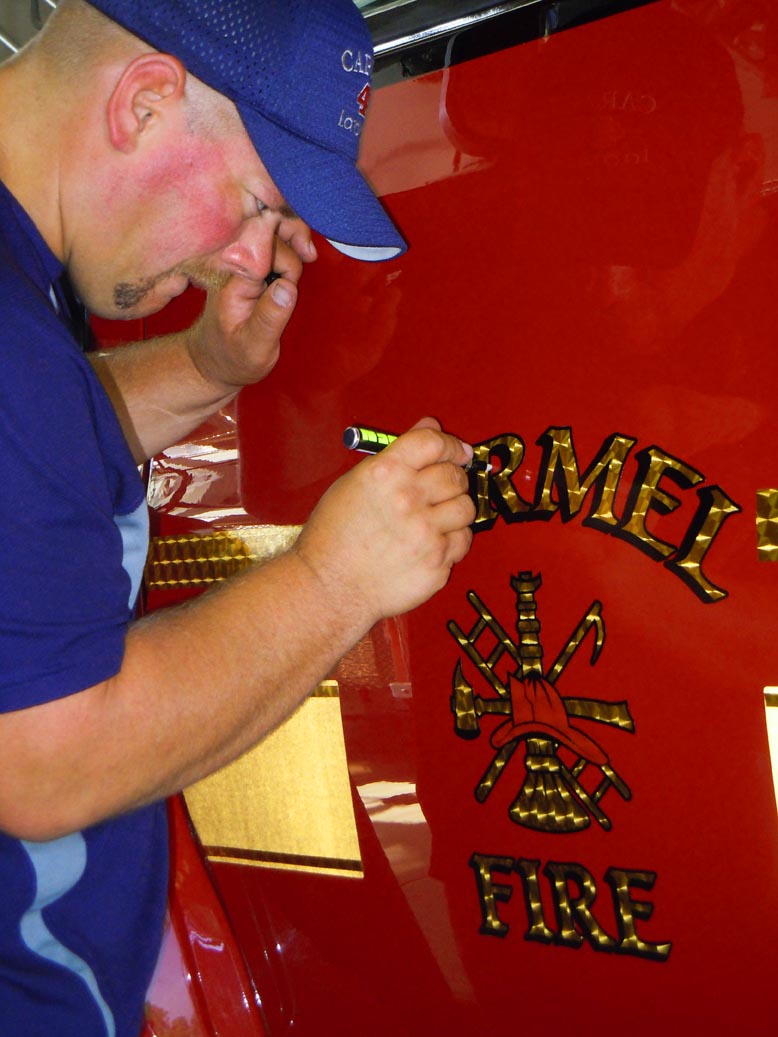
Knives and scissors.
For most graphics jobs, I prefer using an old fashioned utility knife with a retractable blade. Still, I always keep an assortment of high-quality knives and scissors. A sharp knife is essential for cutting vinyl at the seams. Uncut vinyl tears when the panels expand, and contracts as temperatures change.
If you are cutting graphics during an application, use caution so you don’t cut into the side of a customer’s vehicle. With a little practice you should be able to develop the skill to cut through a vinyl film without damaging the substrate. An X-acto® knife with a # 11 blade is excellent for this type of precise graphics trimming. With very light pressure, a new blade will slice through a 2 mil cast vinyl graphic, without cutting into the substrate. X-acto blade are relatively cheap, so replace them as soon as they dull. Invest in a good pair of scissors, which will cost $15 to $25.
For cutting vinyl, I prefer the Olfa OLO Rolling Scissors, which uses roller bearings to cut. The rolling scissors cost approximately $20, and produce a clean, straight cut.
Layout tools.
For me, the most time consuming part of any project is laying out the job. To help in this process, my tool box contains an assortment of tools. For calculating dimensions on an installation diagram, an architect’s scale rule, proportion wheel and pocket calculator are essential. My other layout tools include my tape measure, straight edge, T-square, felt-tip marking pens, Stabilo pencils and a chalk line help position the graphic elements. (Don’t apply pressure-sensitive film over chalk lines, because the dust will contaminate the adhesive.)
To tape graphics in place, have plenty of 1” and 2” masking tape. Wider rolls of masking tape also are needed to create center, top or side hinges to aid application. When you select a masking tape, it makes no sense to buy cheap. For a few extra cents, you can buy a good quality name brand product. Choose a tape that will unwind easily, with no unexpected tearing, and does not leave any adhesive residue that would require clean up.
Safety Equipment.
Many of the chemicals used for adhesive removal are hazardous and toxic. For example, one of the removers that I frequently use contains toluene. Toluene is the solvent in airplane glue that can make you high. In addition to giving you quite a buzz, prolonged exposure to this solvent affects the nervous system and can cause permanent health complications, including brain damage. Other solvents are carcinogenic, while strong acids and alkalis can cause serious chemical burns.
If you don’t follow the manufacturer’s recommendations when using these removers, you can subject yourself serious harm. When working with hazardous chemicals, it is important to protect your lungs, eyes and skin. Chemical gloves, safety glasses and a respirator are essential installation tools.
When working with hazardous adhesive removers or when spray painting, you should wear a charcoal respirator—a dust mask will not provide adequate protection. I use a respirator that uses charcoal canisters that filter out harmful fumes.
Be aware that these charcoal canisters have a limited life. Within 40 hours the canisters become saturated with toxic material and require replacement. One rule of thumb is if you can smell solvents while wearing a mask, it’s time to replace the filters.
The replacement filters come in bags that are hermetically sealed. You should not open the bag until you are ready to use the filters. Once you do, the clock starts ticking. You can extend the life of these filters, by storing the cartridges in a “zip lock” plastic bag, when you are not using the respirator. Respirators sell for as little as $50. Respirator cartridges cost less that $18 for two.
Conclusion.
At the next sign industry tradeshow or seminar, take the time to investigate the new tools on the market, such as the RollePro or 3M’s new line of tools for applying graphics to textured wall surfaces. Granted, professional tools won’t make the novice a professional graphics installer, but you can’t do a professional job without them. Success in vinyl application is a combination of the using the right tools, the right materials and the right application technique.


