I had asked an old sign painter what primers and paints he used when painting MDO. “Why would anyone today use MDO, when you could paint on Dibond® or Polymetal™?” he responded brusquely.
That wasn’t the answer that I was expecting and I certainly didn’t need a lesson about the advantages of aluminum composite material (ACM). 30 years earlier, I had installedAlucobond®, a construction grade composite panel, to clad the fascia of building. These panels are lightweight, durable and easy to fabricate, using many of the tools that you would use for carpentry. You can back rout it, bend and join these panels as well as easily mount them using a variety of extrusions.
Today, economical versions of aluminum composite panels are available for sign applications. Comprised of a thermoplastic core of either polyethylene or polyurethane, these panels are covered on either side with a coated aluminum skin. The aluminum is typically between .01” and .012”, which is about half the thickness of the construction grade material, which is faced with .020 aluminum.
Many manufacturers produce aluminum composite panels. In the sign market, these companies include 3A Composites, which makes Dibond; Laminators Inc., manufacturer of Omegabond; and Nudo Products, which produces Polymetal.
When I worked with these panels, we covered the sheets after they were mounted with vinyl graphics. You can also screen print these composite panels, digitally print them with a flatbed printer and, of course, paint them.
One big advantage of aluminum composite panel over other substrates, such as MDO is that it is easier to paint. You also don’t need to fill the edges prior to painting, and, in many cases, you can paint the panels without a primer, after prepping the surface with isopropyl alcohol and scuffing it with a Scotch-Brite® pad.
If you are old sign painter, you can hand paint or pinstripe aluminum composite panels with lettering enamels, such as 1 Shot or Ronan Paints. With the right surface preparation and primer, you can also use a wide range of other paint systems including latex house paints, lacquers, urethanes, epoxies, water-borne airbrush paints and acrylic and oil-based paints for fine art applications.
Surface Preparation
Before you scuff and prime an aluminum composite panel, you must first remove the surface protection film and clean the surface. If you don’t clean the substrate before scuffing or sanding, you can drive the contaminants into the surface, which can compromise the adhesion of the primer or paint.
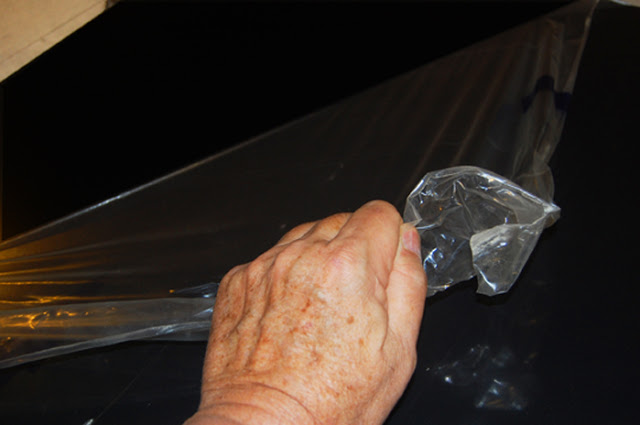
Remove the clear surface protection film that typically covers the aluminum composite panel. This low density polyethylene masking, which is coated with a very low tack adhesive, should remove easily. Before sanding or scuffing the surface of the panel, clean the substrate with 70% isopropyl alcohol. Failure to clean the surface could drive any residual contaminants into the coating on the panel as you are sanding. This could compromise the adhesion of the primer or paint.
Cleaning the surface of a new panel with isopropyl alcohol (IPA) should be sufficient to remove any contaminants. If a sheet has been laying around your shop, you may need to first wipe the surface with a mild wax and grease remover or xylene. In prepping the surface of ACM, do not use any oily solvent, such as mineral spirits or turpentine.
After using a wax and grease remover, a second cleaning with IPA will remove any residual film that the solvent cleaner will leave. Do not clean the surface with a glass cleaner containing silicone, such as Windex. Any silicone left on the substrate can inhibit primer or paint adhesion.
A good habit to get into is to clean the panel before sanding or scuffing, and then clean the panel afterwards.
Isopropyl Alcohol
Isopropyl Alcohol is available in different concentrations, such as 70% and 90%. For surface cleaning prior to painting or vinyl application, 70% is recommended. The reason is that the higher concentration evaporates too fast. In removing contaminants for a substrate, you need dry the surface with a lint-free cloth, while the IPA is wet. After the alcohol evaporates, it is too late.
As soon as the rag becomes dirty, discard it and get a new clean rag. You should continue cleaning until you can wipe the surface and you can no longer observe any dirt on your rag. Until then, the substrate is still contaminated. You can buy lint-free paint prep rags at an automotive supply store or on-line from companies, such as Eastwood (www.eastwood.com).
As important as it is to clean the substrate, you also need to keep your hands clean. Frequently washing your hands prevents your skin oils from contaminating the surface of the panel.
Scuffing the Surface
After initially cleaning the surface, you can block sand the surface with 320-grit sandpaper. This provides a nice, smooth finish for either a primer or top coat.
It is possible to sand a surface to the point that it is too smooth. For this reason, do not use sandpaper finer than 500-grit. Paint needs enough tooth to mechanically lock into the primer.
Instead of using sandpaper, you can rough up the surface with a painter’s maroon (red) 3M Scotch-Brite pad. The automotive grade pads are available in colors other than maroon. Each color signifies a different grit range. For sign painting applications, two grades of pads that you should have in your shop are the maroon and the gray pads.

Use a maroon (red) Scotch-Brite® pad to scuff the gloss or semi-gloss surface of the panel until every shiny area is dull.
The 7447 general purpose maroon (red) pads are equivalent to 320-400 grit. Use these pads to scuff the substrate. If you prime the substrate, use the gray pads to scuff the primer before painting. This ensures good intercoat adhesion. The 7448 gray pads are equivalent to 600-800 grit sandpaper.

The key to properly scuffing the surface of an ACM panel is to abrade it so it no longer has either a glossy or semi-gloss finish. Dulling the surface of the panel will give it enough tooth to ensure that the paint or primer adheres well. When you sand the surface, make sure that you do not wear through the coating on the aluminum to the bare metal.
After scuffing the surface, clean it with IPA to remove any residue. Using a lint-free paper towels, continue to clean the panel until no residue show on the toweling.
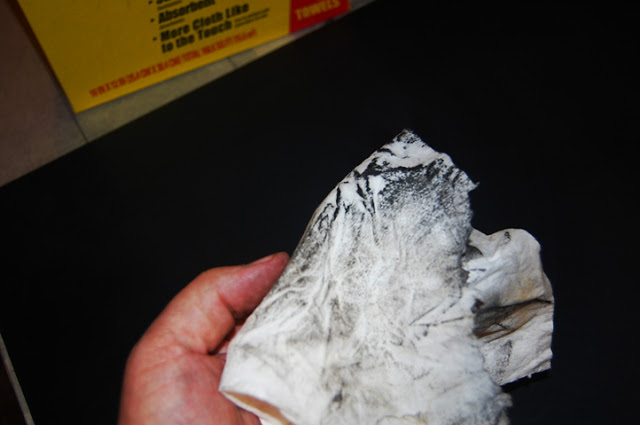
Using isopropyl alcohol and paint prep toweling, continue to clean the surface of the panel, until you no longer pick up any residue. A good practice when cleaning is to have a rag in each hand – one wet with isopropyl alcohol, and the other dry to mop up the alcohol and contaminants.
NOTE: After sanding or abrading the substrate, never use an air hose to blow off any residue for a couple of reasons. First, the force of the compressed air could blow contaminants into the surface of the panel, which could affect adhesion of the primer or paint. Secondly, blowing the dust off the panel sends it airborne. Not only could you or your employees breathe paint dust, but it takes several hours for the dust to settle. If you paint the panel while the dust is in the air, the dust will likely settle on your paint job.
Clear Coating. You can also use the gray pads to scuff a painted surface prior to clear coating. Unless you are clear coating a metallic paint, these fine scratches will not be visible through the clear coat. The tooth that the scratches give to the painted panel allows the clear coat to grip the surface, preventing sagging on vertical surfaces.
Are Primers Necessary? Some of the panels can be painted directly without the need of primers. Many sign painters have used aluminum composite panels as substrates for pinstriping panels. Airbrush artists have also used these panels for painting. Scuffing the panels using a maroon Scotch-Brite pad is recommended before airbrushing.
Test, Don’t Guess
Before painting on any substrate, you should read any pertinent technical bulletins from the panel and paint manufacturers. While this literature will familiarize you with the proper procedures in decorating the surface, your responsibility as a manufacturer is to quality the compatibility of all materials used. That means that you need to conduct your own tests.
The most important tests to conduct are adhesion tests. These tests range from a simple thumb nail test, in which you use your thumb nail to scratch the paint or primer from the surface to a cross-hatch test.
A cross hatch test checks the adhesion of the coating to the substrate. You can also use this test to evaluate the intercoat adhesion between two layers of coatings, such as the adhesion between the primer and paint.
The cross hatch test consists of lightly scoring the printed ink sample or paint sample eleven times with an X-Acto® knife and then scoring the ink again the same number of times over the first set of lines at a 90° angle, forming a grid. The cross hatch pattern of parallel lines should be approximately 1/8” (.32 cm) apart.
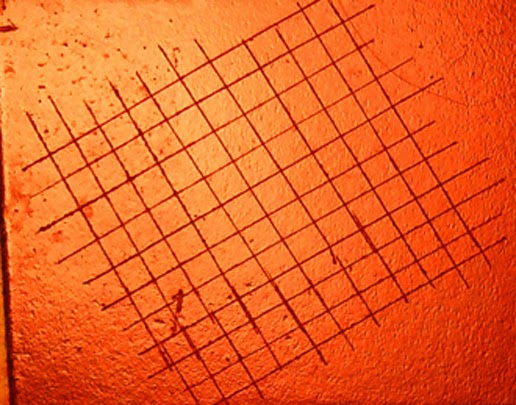
Using an X-Acto knife lightly cut cross hatch lines at a 90° angle forming a grid.
After cutting the lines, use a plastic squeegee to burnish an aggressive tape, such as 3M Brand #600 clear tape, over the scored cutlines. The tape is then pulled off 180° against itself, in one quick motion. If any of the paint comes off, the adhesion of the ink to the substrate is insufficient. Coatings, which have not formed a strong bond, are prone to peeling.
Primers
Artists and sign makers have used a variety of primers and paints in decorating ACM panels. In the sign industry, many old timers would use XIM UMA Bonder Primer, when repainting the slick surface of porcelain signs.
UMA® is a fast-drying, water-based, low VOC primer suitable for either indoor or outdoor applications. It is a great primer for hard-to-stick to surfaces, such as glass, glazed block, tile, fiberglass and most plastics. Sign makers and artists also use this primer for aluminum composite panel.
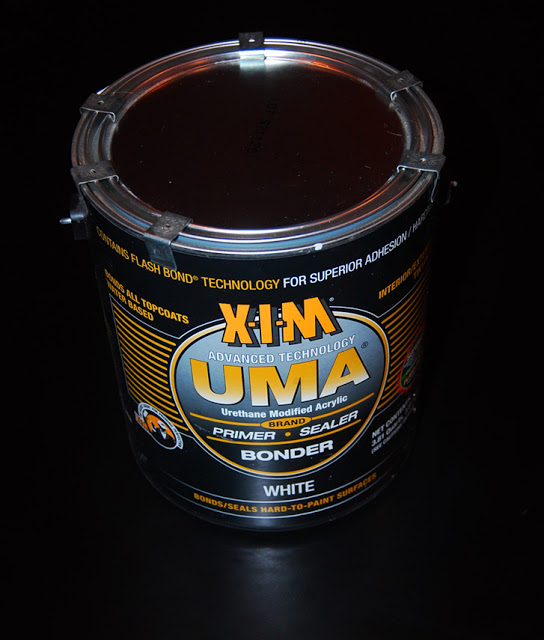
After priming the substrate with two coats of XIM UMA Bonder Primer, you can apply a finish coating using latex paint, waterborne airbrush paint, lettering enamels, lacquers, epoxies and urethanes.
XIM UMA Bonder Primer is suitable for both indoor and outdoor applications. You can use it with a variety of paints from lettering enamels for sign applications to water-borne paints for indoor applications, such as wall murals. If you are an artist, you can also use this primer instead of a gesso coat.
Before using UMA or any other primer or paint, thoroughly mix it before application. This ensures that all of the ingredients are uniformly dispersed within the mixture. If you are mixing a gallon of primer, some professional painters will pour the primer between two paint buckets after scraping the bottom of the paint can of any of the solids that had settled.
If you use XIM UMA to prime the ACM panel, you can coat the surface with either a brush or roller. This XIM primer is also available in a rattle can. If you decide to use a roller, you will achieve a much smoother finish using a foam roller versus the type of roller that you would use to paint drywall.

In using XIM UMA, a Rust-Oleum brand, you can coat the substrate using a synthetic brush or a roller. This primer is also available in a spray can. The foam roller gives a uniform and smooth finish. XIM UMA dries fast so you can generally apply a second coat after three hours. After priming, wait 24 hours before applying a top coat.
When priming with a brush, use one with synthetic bristles. In applying the primer, thin coatings, applied in multiple directions, are much better than applying heavy coats.
One feature of this primer that you should like is that it levels out very nicely. Nevertheless, you should apply a second coat of primer. If the surface is not as smooth as you would like it, you should lightly sand between coats using 320-grit sandpaper or scuff with a gray Scotch-Brite pad.
To aid the primer to level out, you can also add a paint extender to the mixture. To thin UMA add two ounces of XIM Latex X-Tender per gallon.
This primer is usually dry to the touch after an hour and can be recoated after three hours. Drying times for any primer or paint will vary depending on ambient temperature and relative humidity.
Allow at least 24 hours for the primer before lightly sanding the surface and painting. When temperatures are below 70°F and humidity above 50%, allow more time for drying.
Tinting the Primer. Some professional painters advise against adding anything to a primer. As a rule of thumb, primers are generally loaded with the maximum amount of pigment. Attempting to tint a primer changes the ratio of pigment to binder.
If you feel that you need to tint the primer so you can easily see what you have and have not coated, use a universal colorant according the manufacturer’s instructions.
Painting the Graphics. XIM UMA dries to a really hard finish. Before applying a top coat, you can scuff the primed surface with a gray Scotch-Brite pad. After scuffing, clean the surface with IPA. As I began painting the panel, I coated the surface with a background color. Depending on the paint used and your shop temperature, it will dry enough to handle in about five hours. After the background paint cures, you can lay out you job and start painting the graphics, after the paint is fully cured.
If you plan to paint a second coat for the background color, you can lightly sand between the coats. This produces a smoother finish, minimizes an orange peel finish and promotes good intercoat adhesion. Before applying the second coat, allow the first coat to dry for at least 24 hours.
Using 320-grit wet/dry sandpaper with a rubber sanding block, you can wet sand the surface by hand. The water helps lubricate the sandpaper so it easily slides over the surface of the paint. The water also prevents the paint from balling up and clogging the sandpaper.

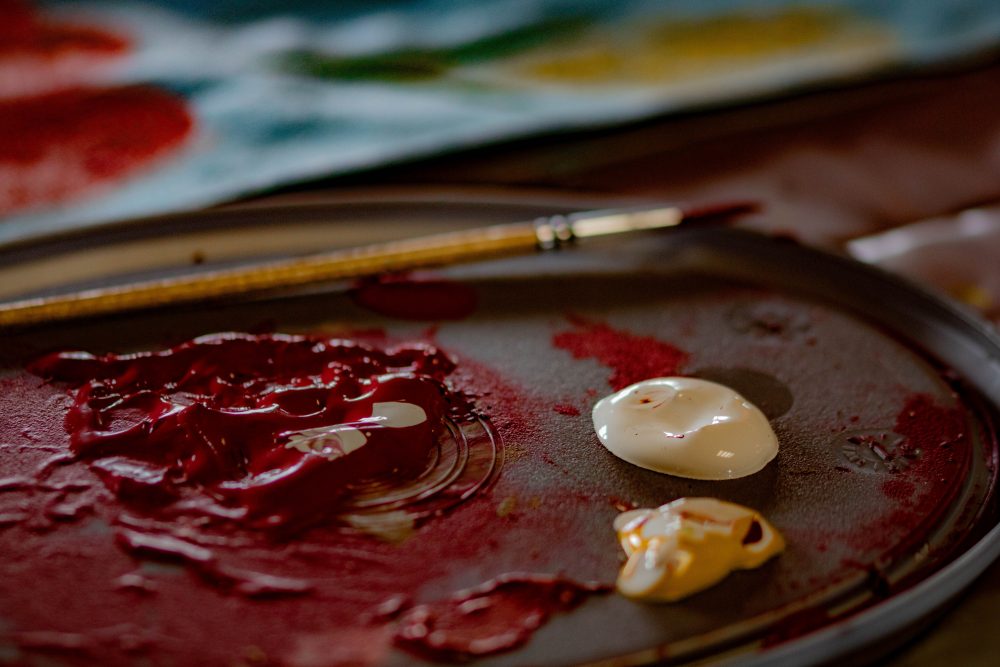
After priming the panel, you can paint the background colors using 1 Shot (http://www.1shot.com) lettering enamels.
For this project, I hand lettered the copy. You can also use a computer-cut paint mask for this part of the job. The lettering enamel will tack up in about 20 minutes. At this time, you should remove the masking with care, making sure that no part of the mask touches the wet paint. Do not wait for the paint to dry or you could tear up some of your newly painted lettering.
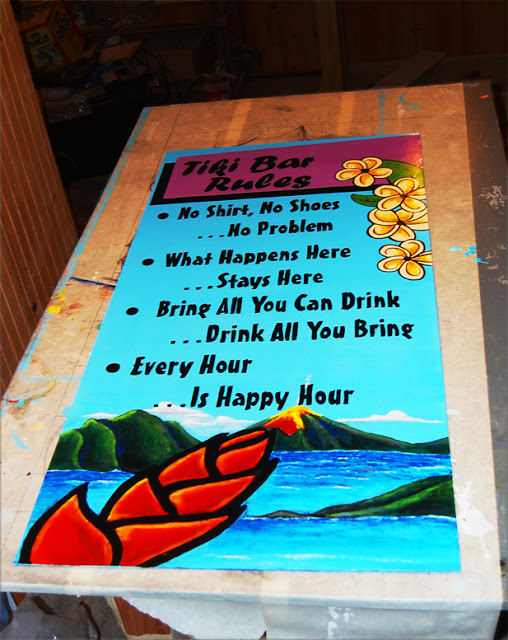
In lettering the project, I used 1 Shot lettering enamel.
Aluminum Composite Panel for Fine Arts.
The idea of painting on Dibond or some other aluminum composite panel is likely considered some form of heresy by those purists, who believe that the only suitable support for fine arts painting is canvas.
Times change. Before painting on hemp or linen canvas, artists painted on wood or painted frescos on plaster walls. Then, during the Renaissance of the 1500s, Venetian artists adopted canvas, which was primarily used for the sails of ships, as a painting support.
Obviously, painting on canvas provided many advantages. In addition to being relatively inexpensive, artists now had a lightweight substrate, which they could easily transport. Canvas also allowed artists to paint large format pictorials. What’s more, unlike wood, canvas didn’t warp.
Canvas, however, has shortcomings. It can rip. The most memorable example is when Steve Wynn accidentally tore a hole in Picasso’s “Le Rêve,” or “Dream” painting in 2006, after just acquiring it for $139 million. The other problem with canvas is that it is a hygroscopic material. In other words, it can absorb and releases moisture. When it does, it expands and contracts. That can cause the painting to crack.
Just as the Venetian artists adopted a commercial product as a support, some artists have adopted aluminum composite panels for fine arts painting. After priming with a coating, such as XIM UMA, you can use either acrylic or oil-based paints.
The advantages of aluminum composite panels for fine arts painting include:
● It is light weight, so it is easy to transport and easy to mount;
● It is dimensionally stable. Because it is does not expand or contract with changes in temperature or humidity, the paint is less likely to crack. Both canvas and wood expand and contract as the environment changes. As these changes occur, both artists’ oil paints and tempera paints crack.
● Aluminum composite panel is more durable than either wood or canvas. Canvas can deteriorate and wood rots; and
● Aluminum composite panels are less expensive than stretched linen canvas.
● Prepping aluminum composite panels are easier, faster and less costly than preparing linen canvas for painting.
Cutting Aluminum Composite Panels
Your sign supply distributor usually can cut aluminum composite panels to your size specifications. You can also easily cut it yourself in a number of ways. Cutting on table saw produces a straight cut. You can also clamp a straight edge to the panel and cut it with a utility knife.
In cutting with a knife, you should begin with a few light cuts and then continue until you break through the aluminum skin. This method requires a sharp knife and as many as fifteen passes. Flip the panel over and cut the opposite side, obviously at the same location as you first cut.
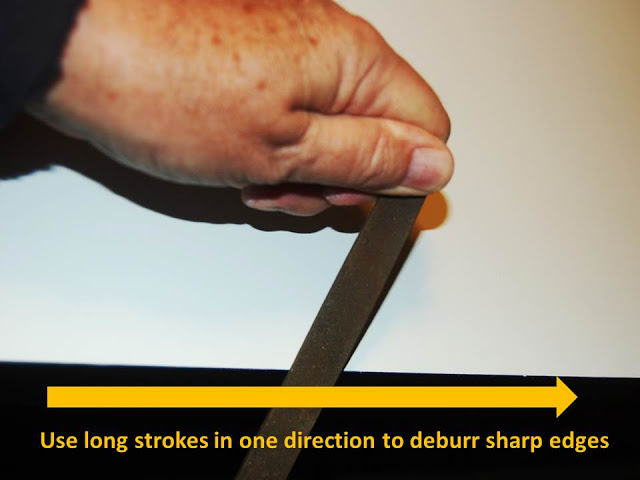
Regardless of how you cut the panel, the edges can be sharp or have some burrs. To prevent cutting yourself, deburr the panel by running a flat or mill bastard file over the edges. Single cut mill files have just a single row of teeth and are sufficient for smoothing rough edges. Using long strokes with the file, pushing in one direction away from you, this should only take a couple of light passes. In case the term “bastard” offends you, all it means is that it is neither medium nor smooth in coarseness, but somewhere in between.
Conclusion
Many of the procedures used in painting an aluminum composite panel will apply to painting other substrates. If you follow these basic rules, you will likely have successful outcomes. If you ignore them, you could face a painting headache.
If you have a paint failure, it is highly unlikely that the paint itself is the cause. Problems with paint jobs often trace back to the following factors: substrate preparation; selecting the wrong materials for the application, incompatibility of raw materials, and finally paint application. To avoid problems, follow these basic rules, which I have summarized below:
● Always invest in the best. Buying cheap materials and supplies just to save a few dollars never pays.
● There are no shortcuts to quality and value. Always take the time to follow the procedures recommended in the technical bulletins.
● Test, Don’t Guess. Before using any primer, paint and clear coat, always test the materials on the substrate for compatibility.
● Always document you work. Record the materials and colors used as well as listing the procedures followed. Include color swatches in the job folder, as well as any pertinent information, such as contract, estimate and labor tickets. Good record keeping ensures that if you do the same or similar job in the future, that you can reproduce your results. Documentation also can help you, if you need to troubleshoot a problem.


