Printing and Cutting Heat Transfer Appliques Using Roland’s BN-20
Many T-shirt shops have purchased Roland’s VersaStudio 20″ BN-20 Desktop Inkjet Printer/Cutter so they can offer digitally printed heat transfer appliques to their customers. In addition to printing appliques, the BN-20 is also a nice entry-level machine for those shops expanding into the sign market.
The BN-20 utilizes ecosolvent inks, which are derived from mineral oils. These very mild inks take take forever to dry. At least it seems that way, especially when you have an anxious customer breathing down your neck. At any rate ecosolvent inks will certainly take longer to dry than the strong solvent inks.
Problems arise when you rush the process before the ink is thoroughly cured, regardless of the type of substrate that you are printing. (Read my story: The Solvent Cure.) So what can you do when you have a rush job?
This is a dilemma whether you are printing fleet graphics or heat transfer appliques. When you print images with a high concentration of ink, a couple of problems can result. In the case of heat transfer films, uncured ink can soften polyurethane films. After all, that’s how solvent inks adhere to any film. The solvent “solvates” or dissolves the surface the film to chemically bite into it.
The RTape SEF line of 100% polyurethane films are highly stretchable, as it is. When the film softens, it stretches even more. The gauge of the film is another factor. Thinner films are more susceptible to the effects of solvents than thicker films and will soften and stretch even more. The result is that as the blade cuts through the printed image, the softened and highly pliable film deforms and does not cut properly, even with a sharp blade and at slow cutting speeds.
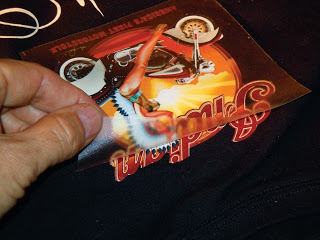
Even if the blade cuts through the film, you can experience weeding issues when there is a heavy concentration of ink. This is more of a problem with large emblems than it is with smaller appliques.
After the applique is printed, cut and weeded, another problem that you can encounter, if the ink is uncured, is that the Hot Mask™ transfer tapes just do not stick properly to printed image. To compensate for this problem RTape recommends using their high tack HM375 polyester transfer tape.
The simple solution is to just wait for the ink to dry before you plotter cut. What’s great about Roland’s BN-20 is that the machine incorporates an optical registration system. That means that you can print the job with registration marks and remove the sheet from the printer, allowing the print to dry. After the ink has thoroughly cured, you can reload the graphics into the printer and contour cut the emblems.
That’s probably the most sensible solution. But it still won’t satisfy that anxious customer, who wants his job an hour ago. So here are a couple of solutions, which will help you deliver the job faster:
- In Roland’s RIP software you can delay the contour cutting, after the BN-20 prints the image. Roland refers to this as the “dry time”. You can set the dry time for as short as 1 minute to as long as 60 minutes.
- In designing the applique, allow for a white border around the graphic to avoid a cut directly into the freshly-printed soft area of the polyurethane film.
- Direct a space heater at the film as it is coming out of the printer to aid the drying of the ink. The BN-20 has a heating function during the print cycle, but does not, however, have post heat. If you use a space heater to aid the drying process, use common sense and follow the manufacturer’s recommendations regarding safe operation of the equipment.
- As an alternative to an offline dryer, Dana Curtis, Roland Care Manager, suggests using a fan to accelerate the curing process. “For most small shops, offline drying may not be a practical solution,” says Curtis. “When using a fan, make sure it is on the right side of the machine blowing left to keep air away from the print system and cap station. You could be asking for trouble by blowing air straight into the print head.”
- Limit the ink concentration to less than 250%. This might limit the amount that that the film stretches – however, I make no promises. A lot depends on the size of the printed applique.
- Hanging the print vertically will allow the media to dry faster than drying the print horizontally on a work surface. Here’s why. Solvent fumes are heavier that air. By laying the graphics flat, the solvents remain on the surface of the film. When the film hangs vertically, the fumes run downward off of the print. As the prints are hanging, you can also accelerate drying by directing a fan or a heater on the printed sheets. Never roll up printed graphics because you will trap the solvent in the roll and the print will not dry properly.
- Maintaining your shop environment at the temperature and humidity specified by the printer manufacturer will also ensure faster drying. In colder shops drying can take longer. Roland recommends that you operate the BN-20 VersaStudio in a shop environment with a temperature between 68⁰F to 90⁰F (20⁰C to 32⁰C), and within the humidity range of 35% to 80%. (Humidity greatly affects the quality of the print. In an arid atmosphere, static can affect the crispness of the print. To control static, another corrective action is to avoid putting the printer/cutter on a carpeted surface. If it must be in a carpeted room, place the machine on an anti-static mat.)
- Finally, I saved one of the most creative and best solutions for last. The principle of Occam’s Razor advises us that the perfect as well as the most elegant solution to a problem is usually the simplest. To solve the problems encountered when cutting into the printed image, Holger Beck of SEF in France suggests cutting the applique first, then printing. Here’s how you do it. First, select “Return to Origin after Cut”. Then choose “Cut Only”. After cutting, select “Print Only”.


